
This is a DIY for the replacement of the main and AC belts, pulleys, and tensioners on my 2001 BMW M3. My pulley(s) started to show signs of failure in Nov/Dec 2015 when they would intermittently squeak at about 83,XXX miles. At a track event, my mic was placed in the engine bay, and you could hear the squeaking in the video (I didn’t hear it in person likely due to my helmet). Sometime in late March, the squeaking suddenly reappeared and wouldn’t go away at 84,1XX miles, so I drove it home to park it in the garage until I had time once the semester was over to replace parts. Work was done at 84,164 miles. Great customer service, and they will get you parts that are not already in their online catalog. I decided to replace all belts, pulleys, tensioners, and hardware because I had no record of previous replacement. I ordered the parts through eEuroparts (first time through them), and it was a pleasant experience.
Video of squeaking pulley. If you skip around, you will hear it get progressively louder.
The job is pretty straightforward and isn’t difficult, probably 3/10. It took me about 5-6 hours to do, which included taking the time to take photos and wasting time doing other things. Some defining terms.. when I say “left” or “right,” right/left will be as if you are sitting inside the car and facing the front. When you are facing the front of the car while working on it, right/left will be flipped, if that makes sense. Clockwise is CW and counter-clockwise is CCW.
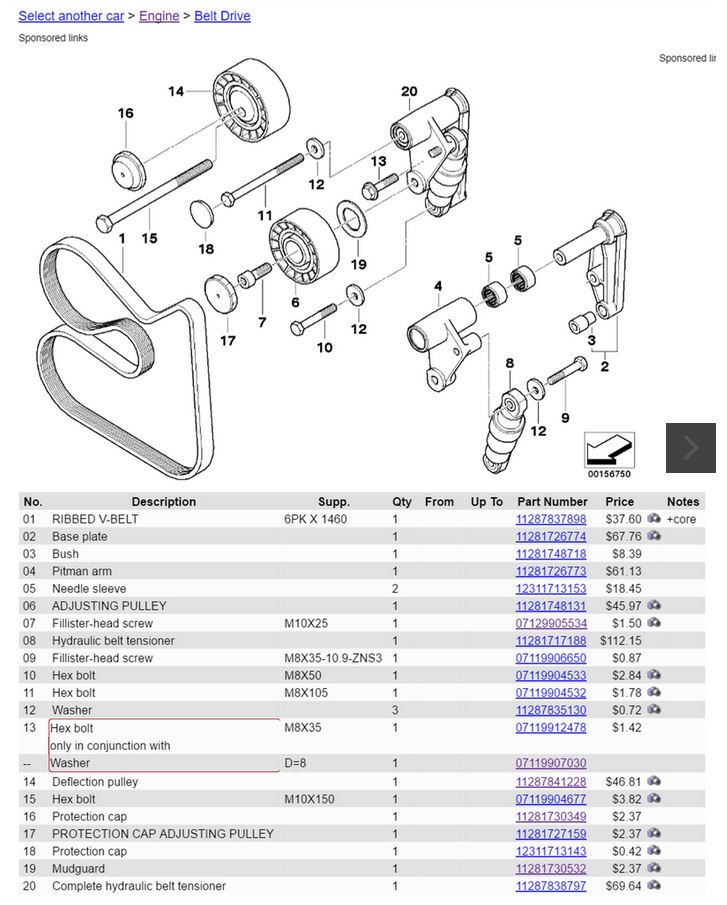
Below is the list of parts I am replacing in this DIY. You could reuse your hardware if you want to; I elected to use new ones. You could use this DIY to replace just belts and/or pulleys, but be smart. Don’t remove a tensioner if you are only replacing belts and pulleys. Don’t remove a pulley if you are only replacing belts. Don’t remove the plastic under tray if you plan to do the work from the top. I worked from both above and below.
B is belt, P is pulley, T is tensioner, C is dust cap/cover, everything else is hardware. X1/2 is the quantity. The last two parts in both lists (478 and 030) are the same. They are only separated to show you how many of the parts will be used in each belt drive system; in total, you will need three of each.
PART NUMBER
MAIN BELT DRIVE
11287837898 x1 B
11281748131 x1 P
07129905534 x1
07119904533 x1
07119904532 x1
11287835130 x2
11287841228 x1 P
07119904677 x1
11287838797 x1 T
11281730349 x1 C
11281727159 x1 C
12311713143 x1 C
11281730532 x1 C
07119912478 x1
07119907030 x1
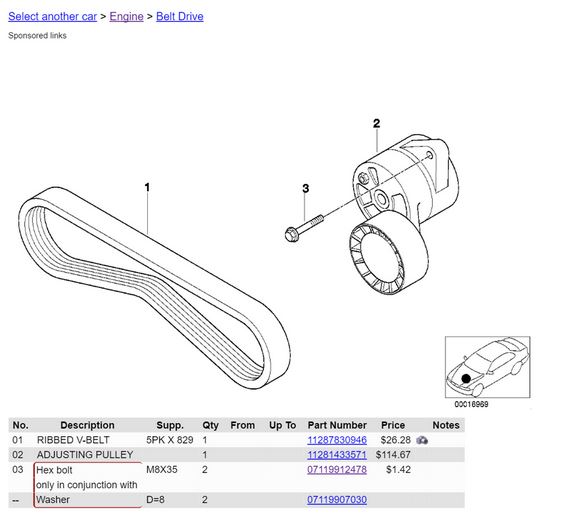
AC BELT DRIVE
11287830946 x1 B
11281433571 x1 P
07119912478 x2
07119907030 x2
Here are the part diagrams for the two belt systems from RealOEM:
Main Belt Drive:
A/C Belt Drive:
Now, to the DIY guide…
1. Lift the car. DO NOT work under a car that is supported by a jack. Remove the plastic under tray.
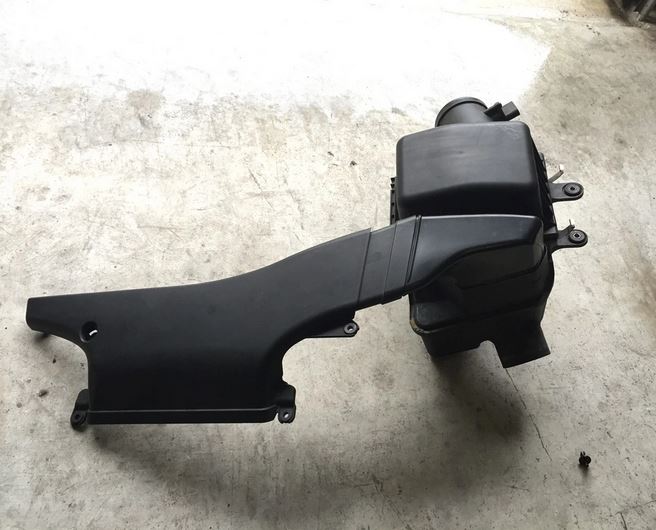
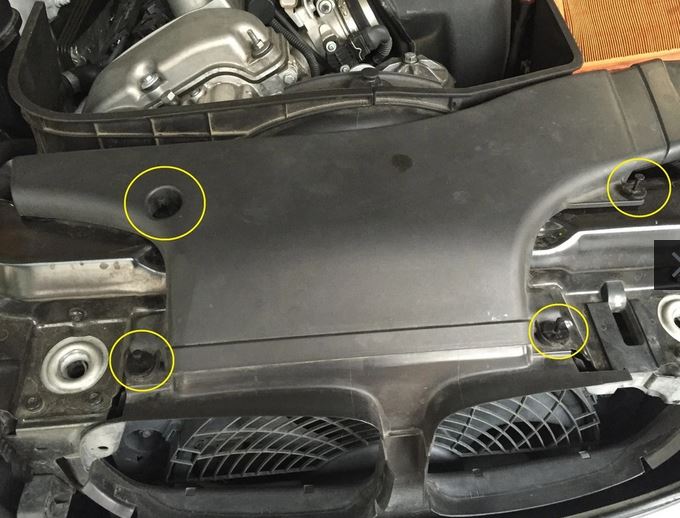
2. Remove the airbox unit and air guide/suction hood.
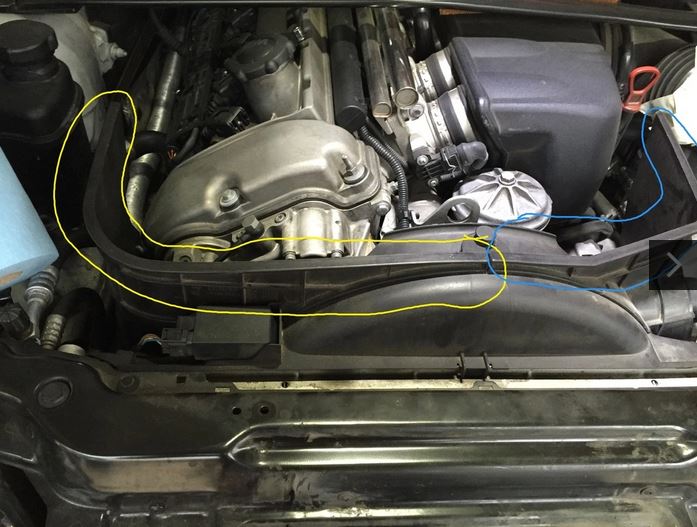
First, remove the four plastic rivets circled in yellow. This will allow you to remove the suction hood.
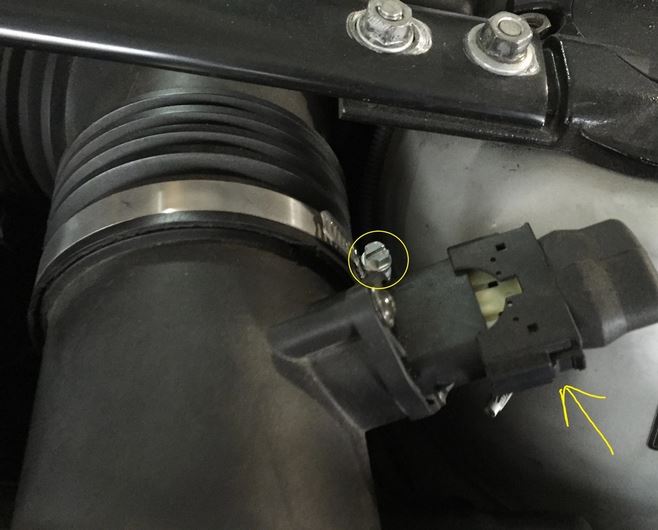
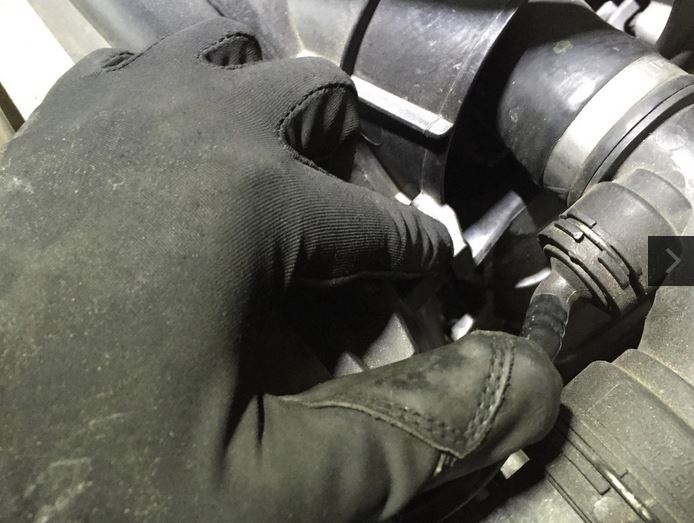
Unplug the MAF and loosen the hose clamp.
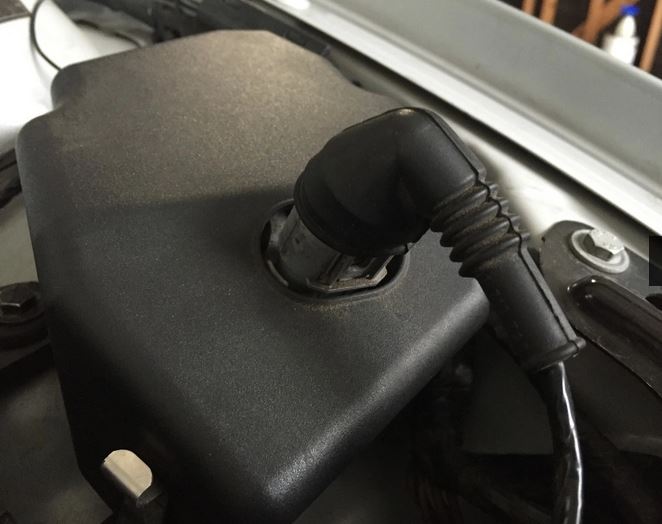
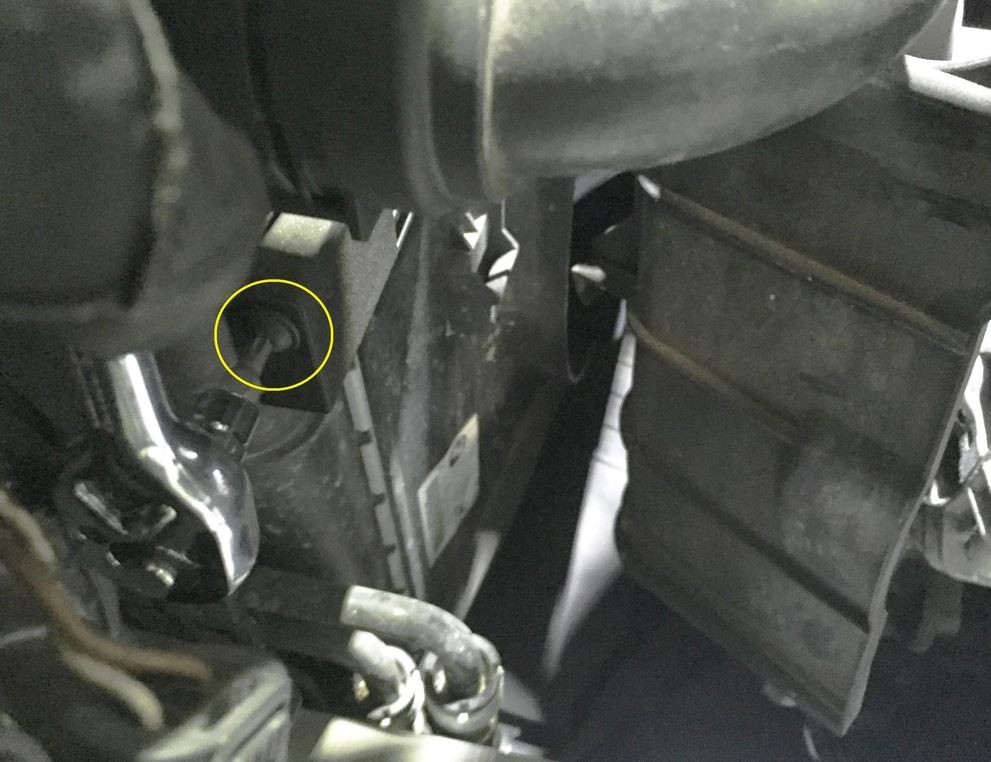
Unplug this sensor, then remove the plastic cover by simply pulling up on it.
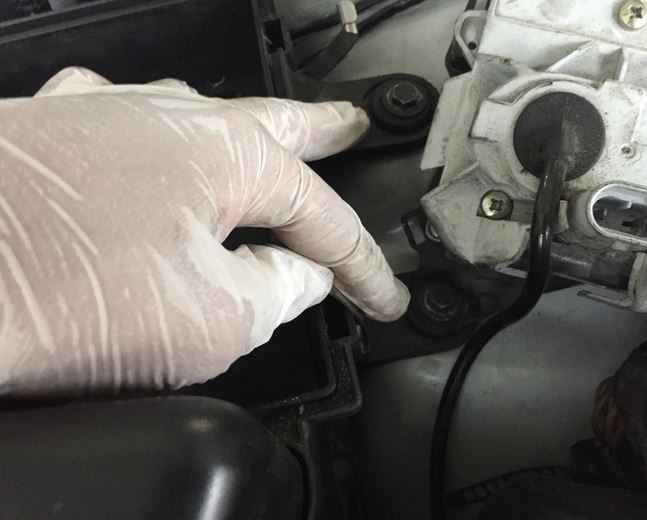
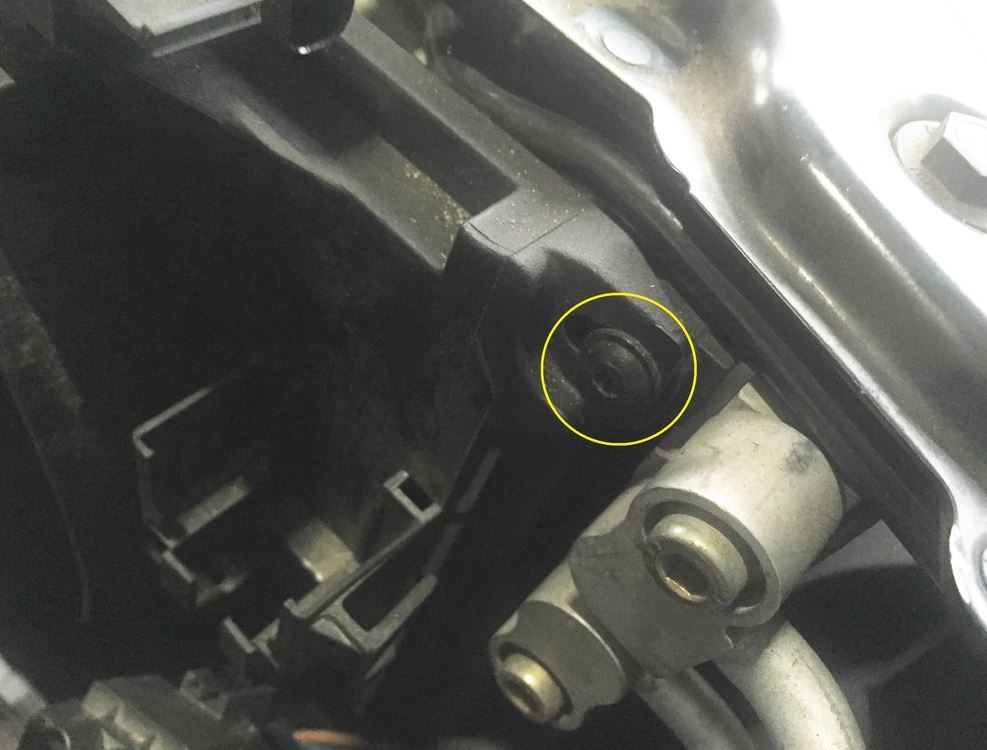
Remove these two 10mm bolts as well as a 10mm washer that holds down the white sensor unit. Pull up on the unit to give yourself some room to remove the airbox unit.
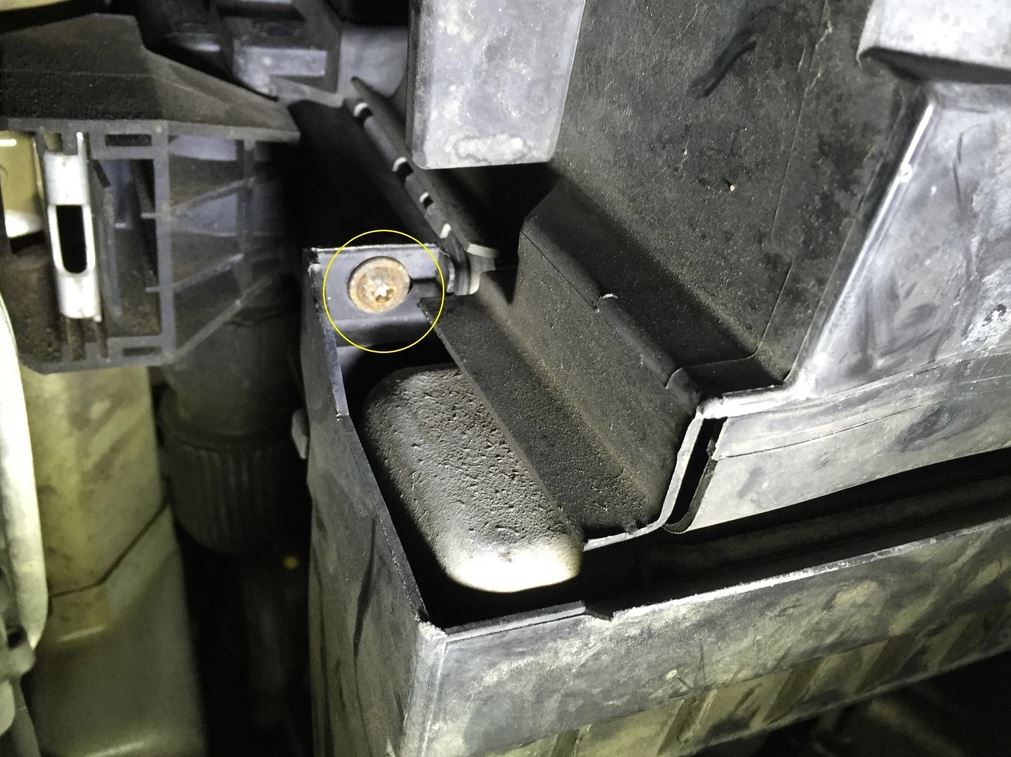
3. Remove the fan shroud duct circled in yellow, and move the one circled in blue out of the way to give you more working space. Each is held on by two plastic rivets, with one being shared by both shrouds.
Right
Left
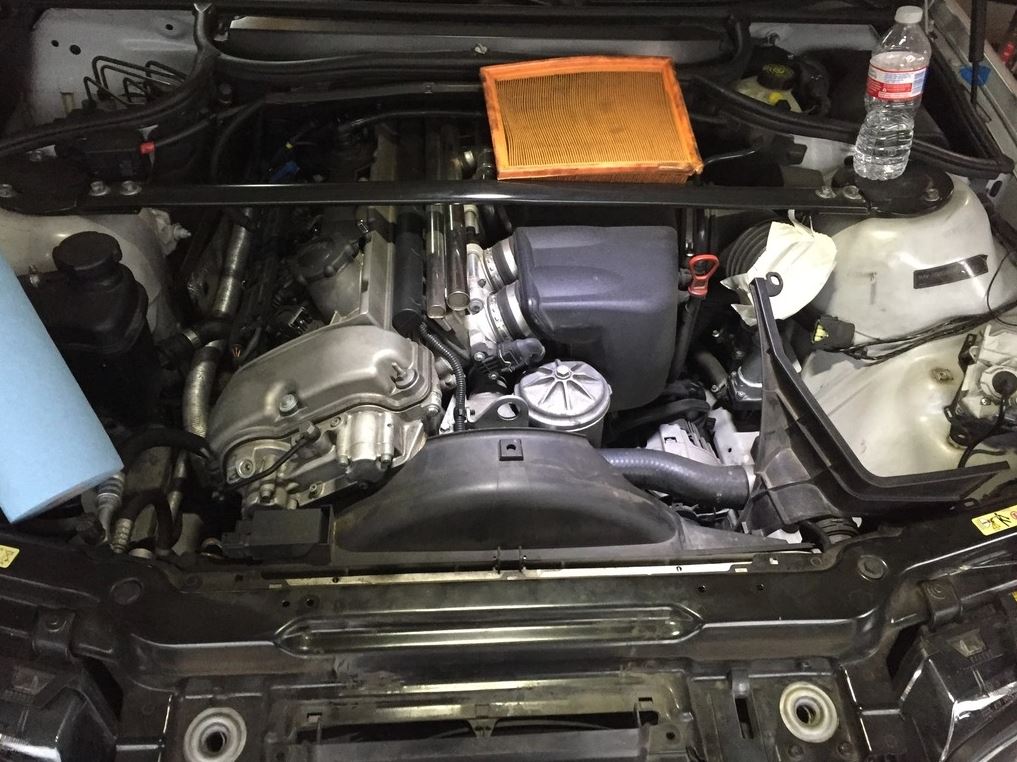
Your engine bay should look like this. You do not need to remove the plastic engine cover; mine is missing because I don’t run one.
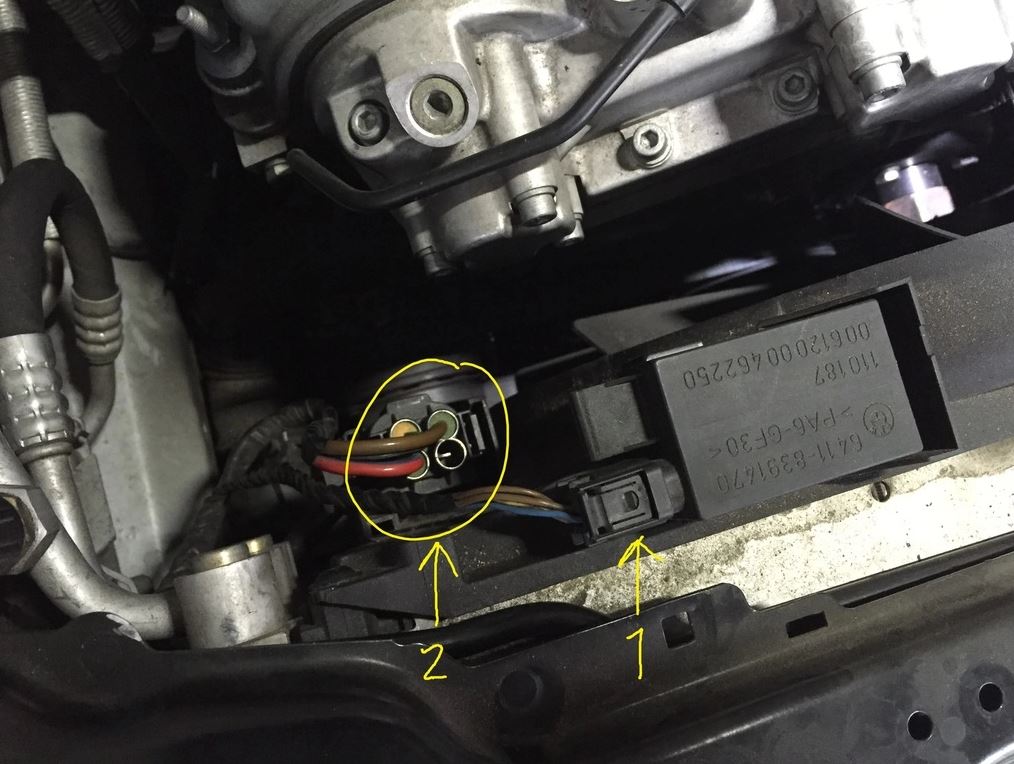
4. Remove the OE fan shroud and fan. They will be removed together. If you have converted to an electric fan, you’ll need to decide whether or not electric fan removal is required.
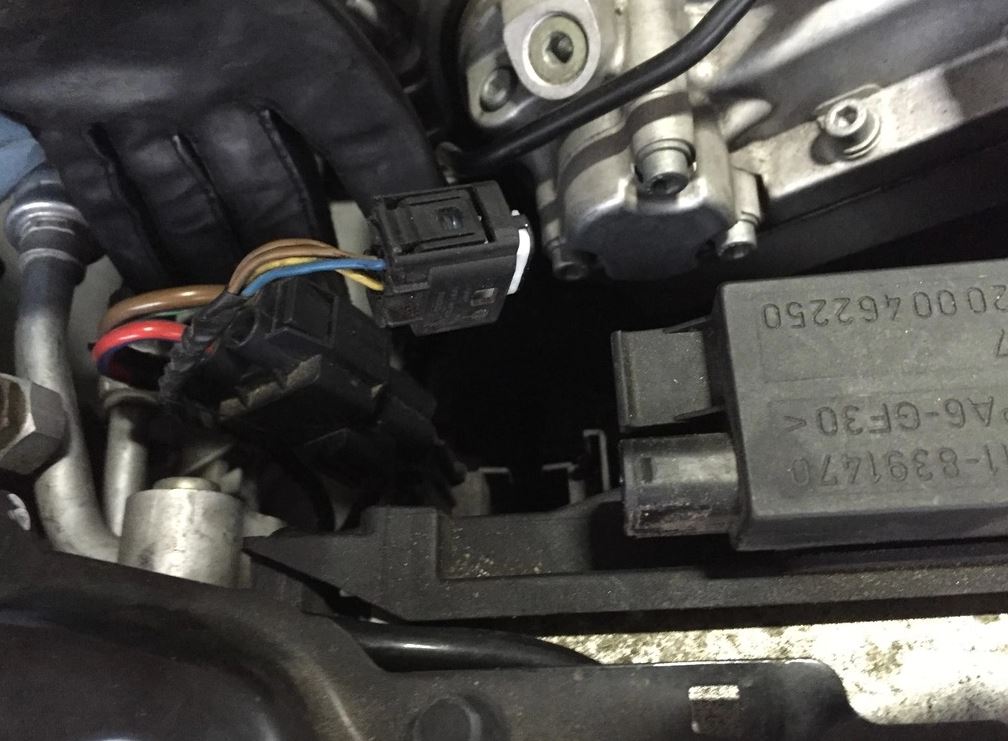
Unplug 1, and pull up on 2 to remove it from its harness; you do not need to unplug 2.
Remove the four T25 torx screws that secure the fan shroud. Their locations are circled in yellow. The yellow arrows point to tabs that also help secure the shroud to the radiator. The blue circles show what the fan shroud ducts are secured to.
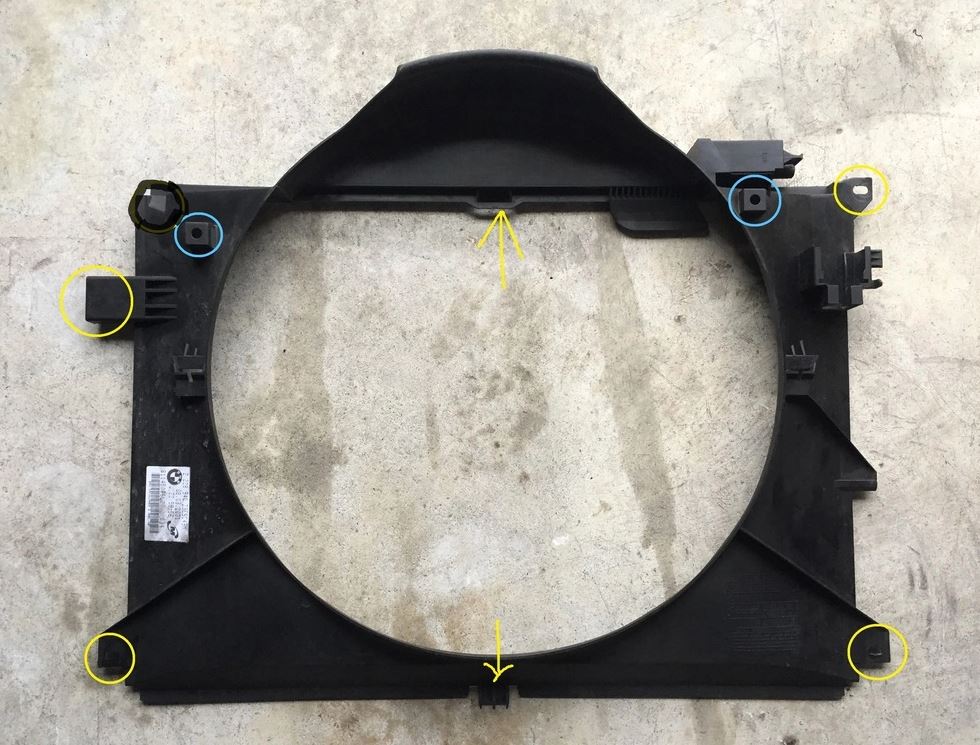
Top right screw
Top left
Bottom left. Don’t mind the leaking power steering lines. It’s minor, and I’m still trying to figure out what exactly is leaking.
Bottom right

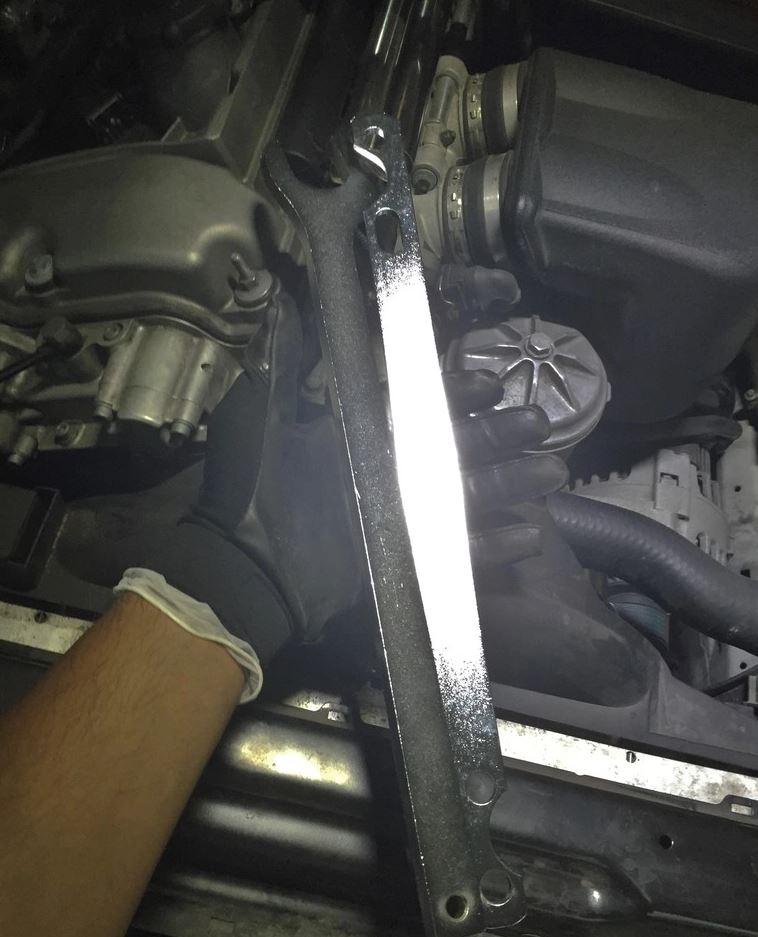
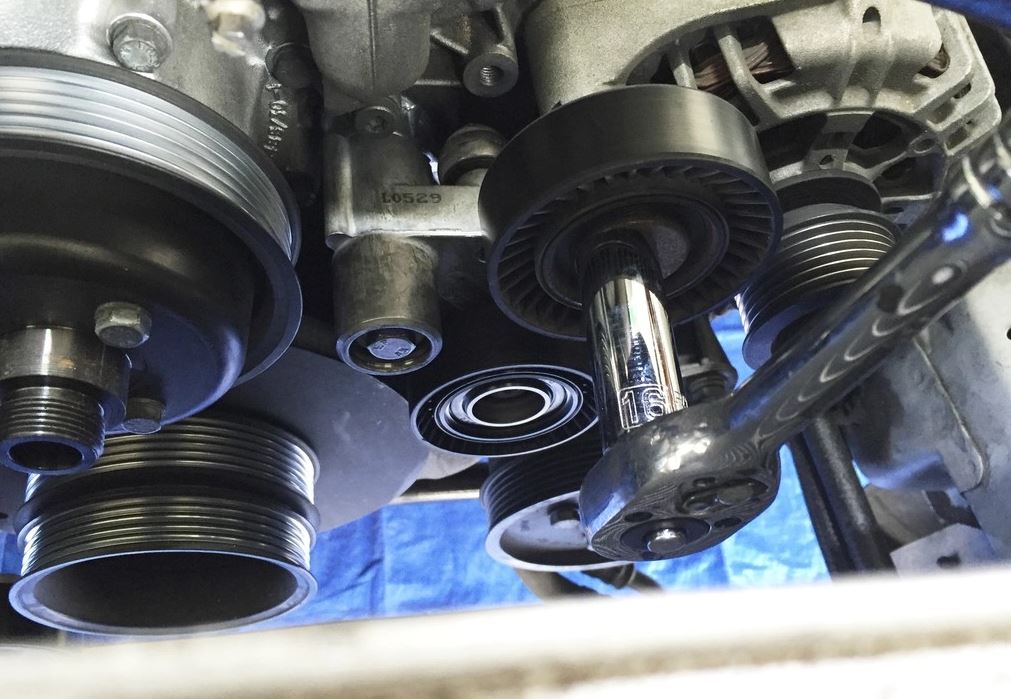
Now you will remove the fan. I used the BMW tool. Some people use a 32mm wrench and hammer to loosen the nut, but I did not want to do that. Turn CW to loosen it. Ensure that you don’t drop and break the fan. Once removed from the water pump, pull both the fan and fan shroud out of the car.
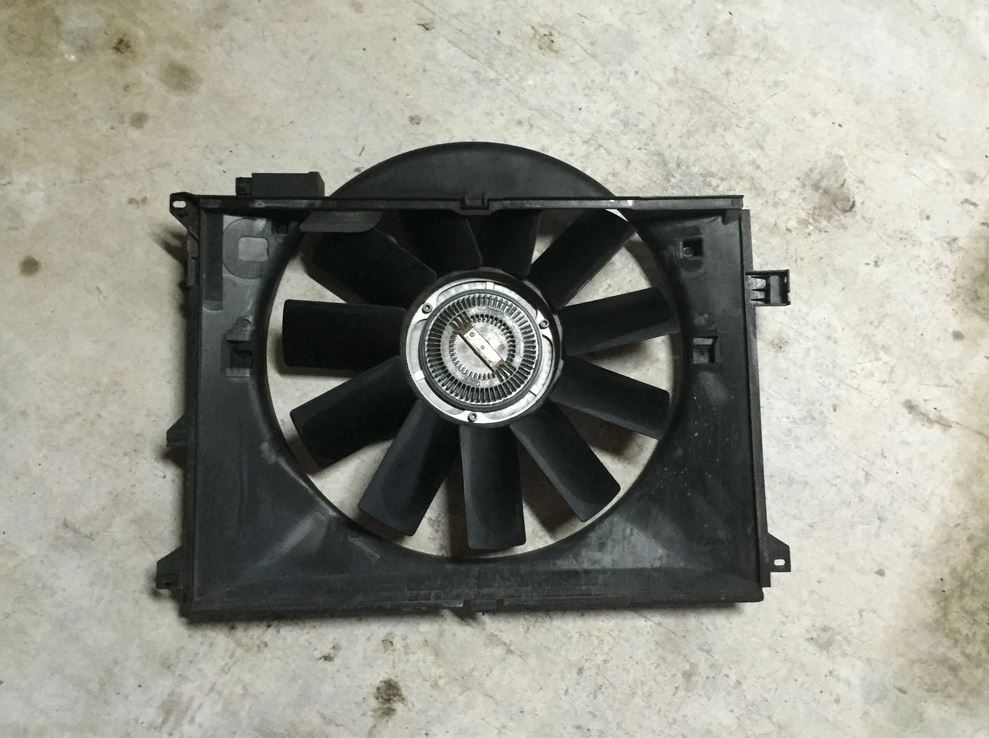
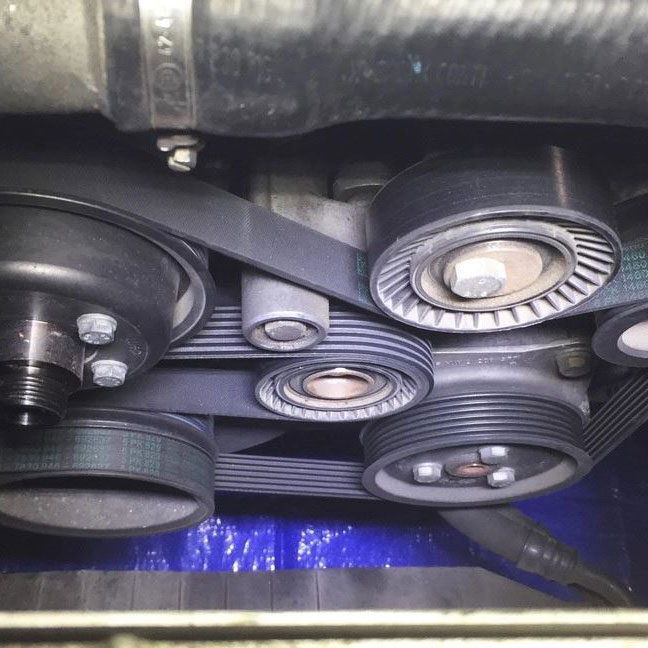
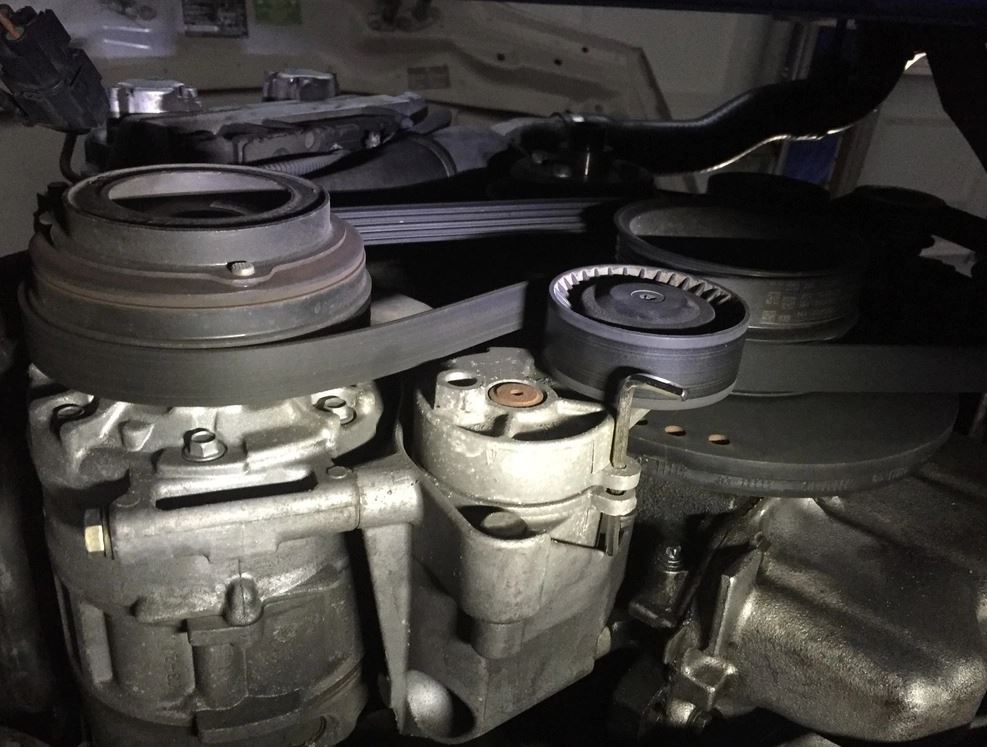
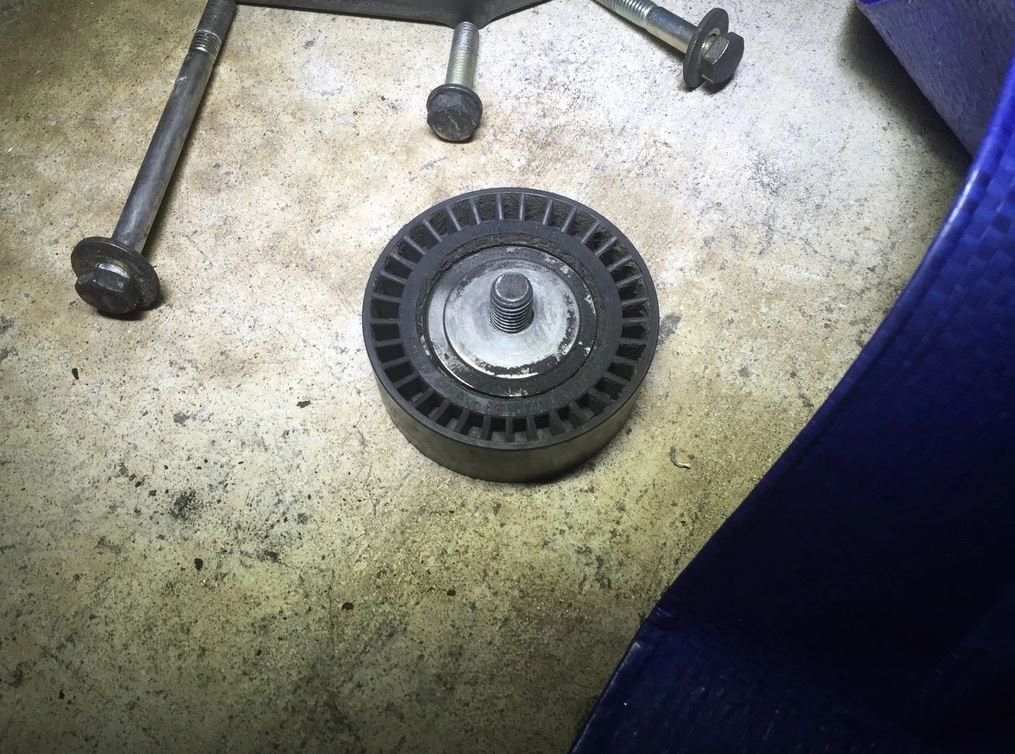
View from above. You will notice that I don’t have the dust covers because, before I took ownership of my car, some incompetent person didn’t put them back on. Go ahead and remove the dust caps. If you are replacing only belts, the blue arrow points to the cap you need to remove; you don’t need to remove the yellow caps.
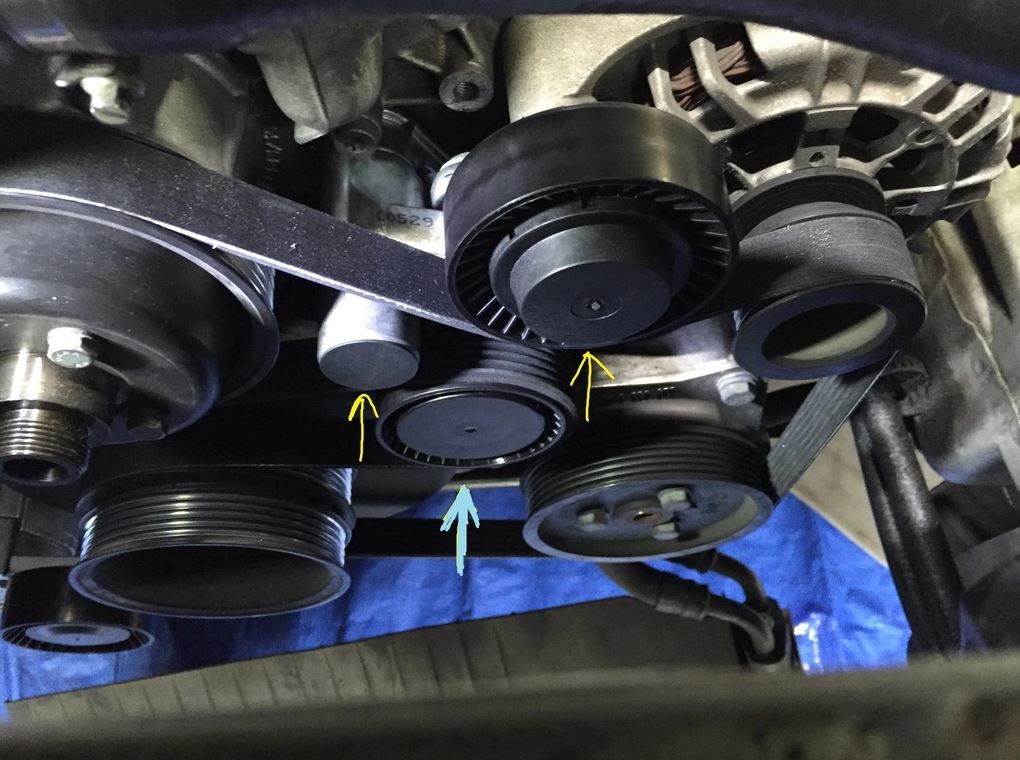
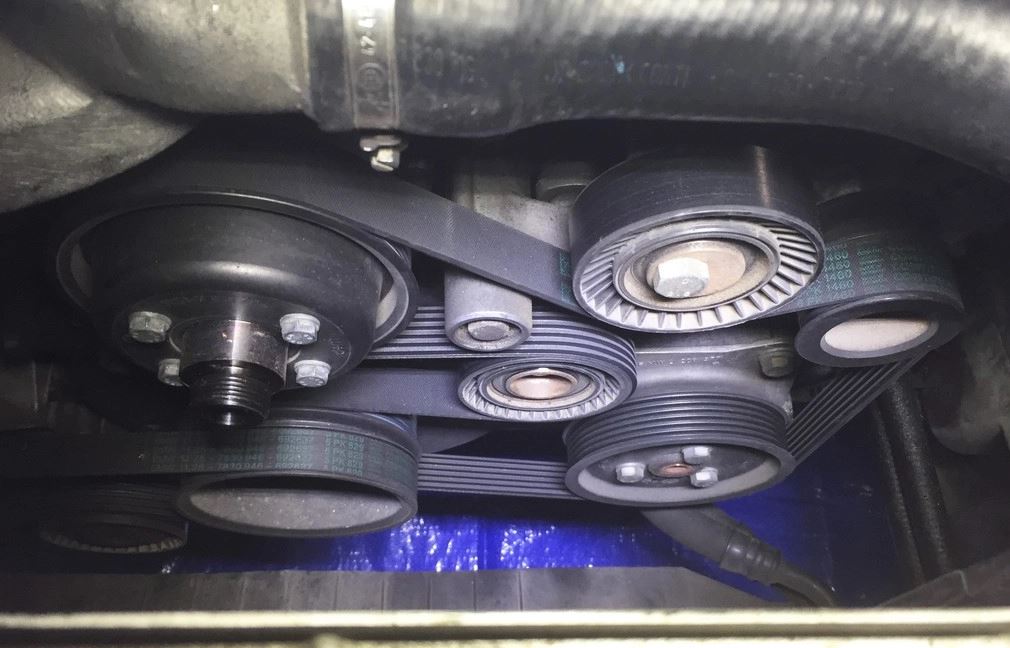

Note that you must remove the AC belt before you can remove the serpentine belt. Also note how the serpentine belt goes around the pulleys. You can also refer to the RealOEM diagram to see how it goes around. The ribbed part of the belt will make contact with the ribbed pulleys, and the smooth part of the belt will make contact with the smooth pulleys.
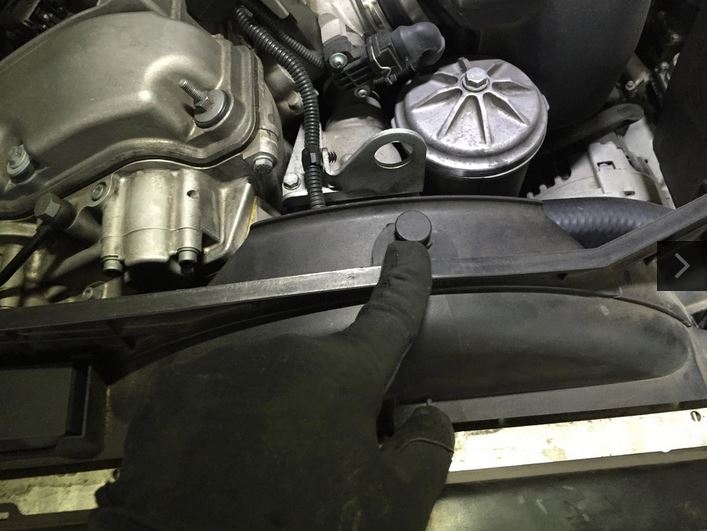
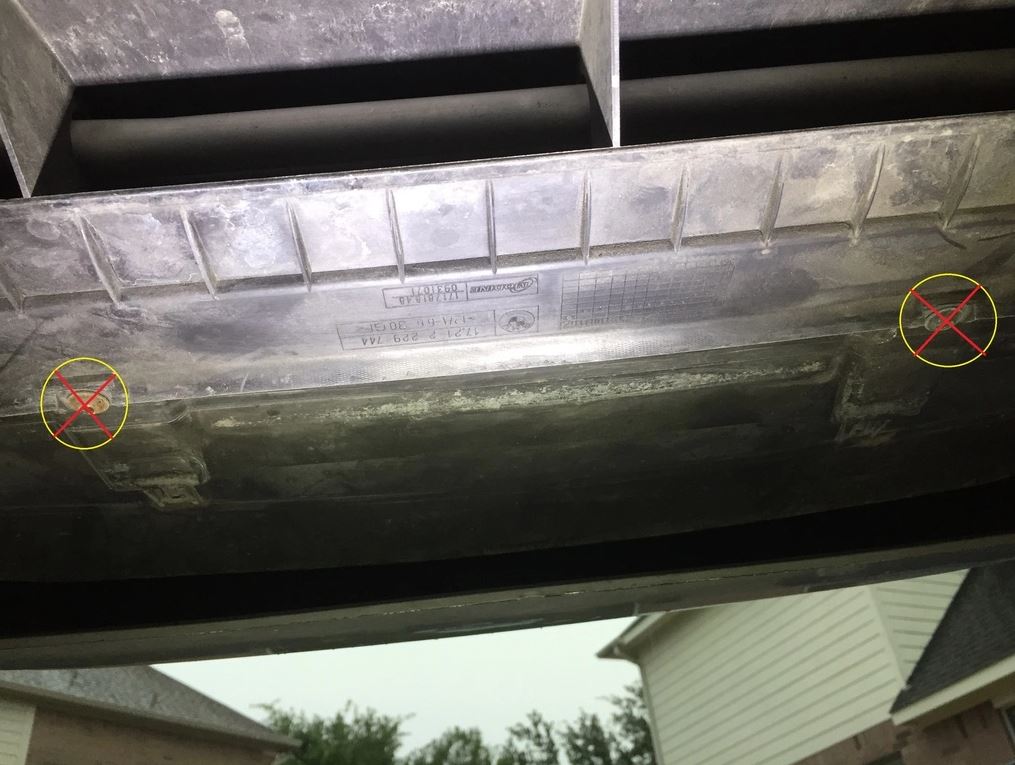
5. Move the oil cooler out of the way. It is secured by two T25 torx screws on either side of it.
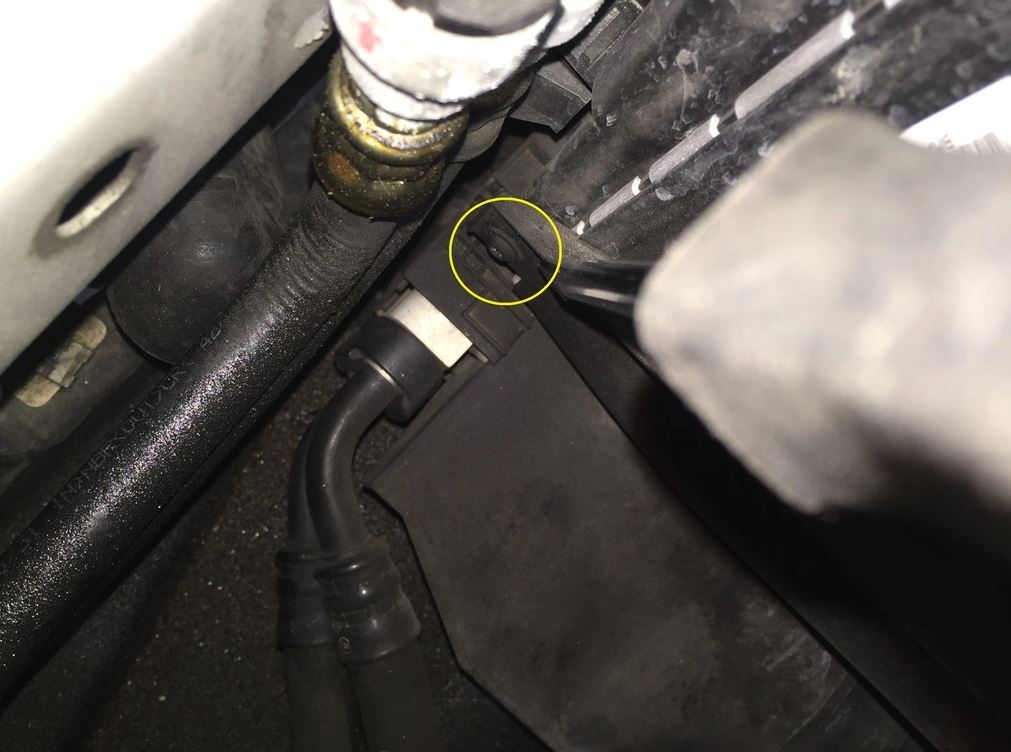
You will also see these two screws. You don’t need to remove them.
6. De-tension the AC tensioner and remove the AC belt. You will turn the 16mm hex washer thing CW and line up the two holes on the tensioner. Stick an Allen key in those two holes to keep the unit de-tensioned. Now you can remove the AC belt. If you plan on replacing the tensioner, you may want to use something that you’re okay with throwing away; I had a hard time removing my Allen key after removal of the tensioner.
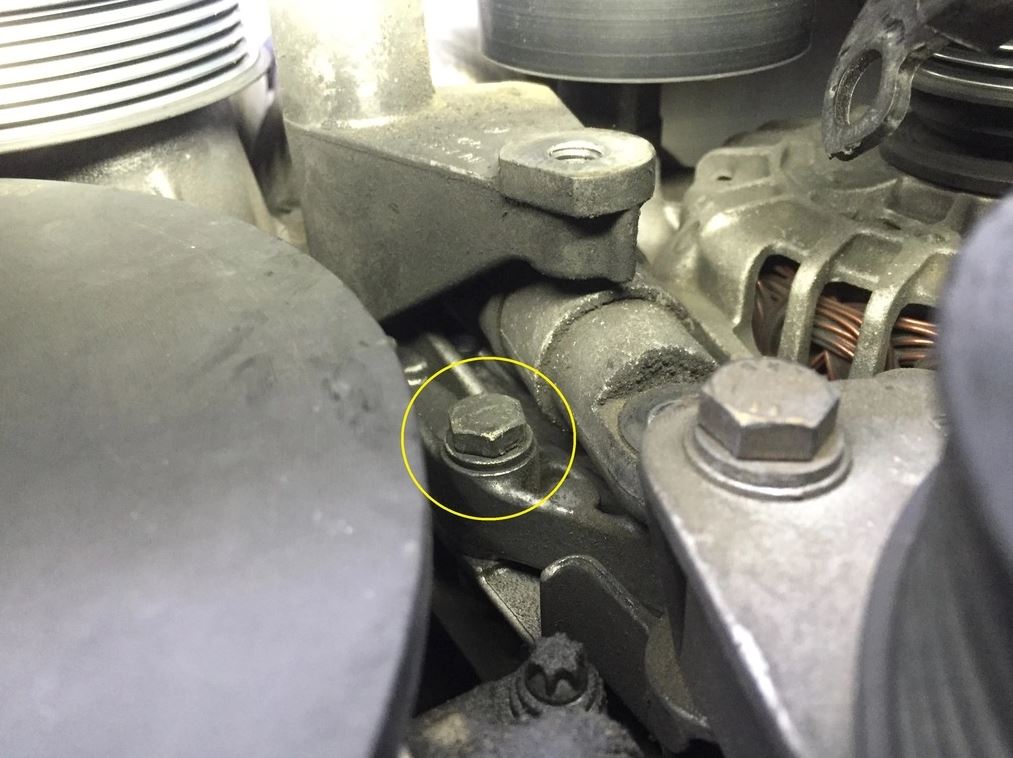
7. If you are replacing the tensioner, remove the two 13mm bolts that secure it. When installing the new tensioner, torque the bolts to 24 Nm (17.7 lb-ft).
If you don’t plan on working on the main belt system, reverse the steps now to put the car back together.
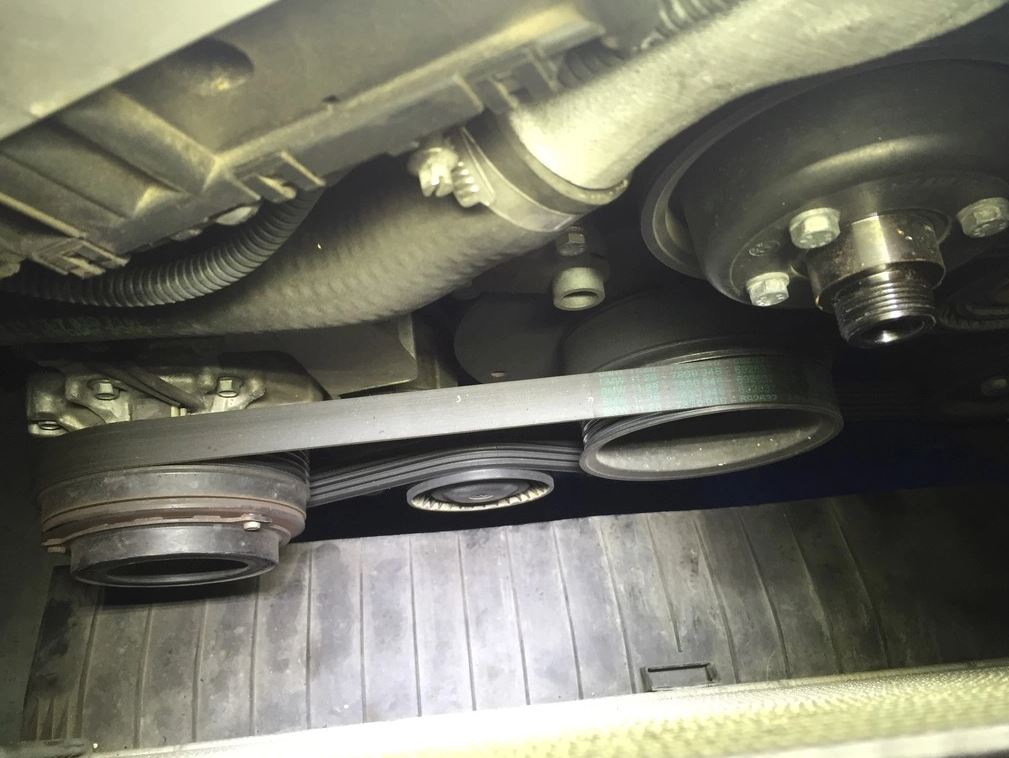
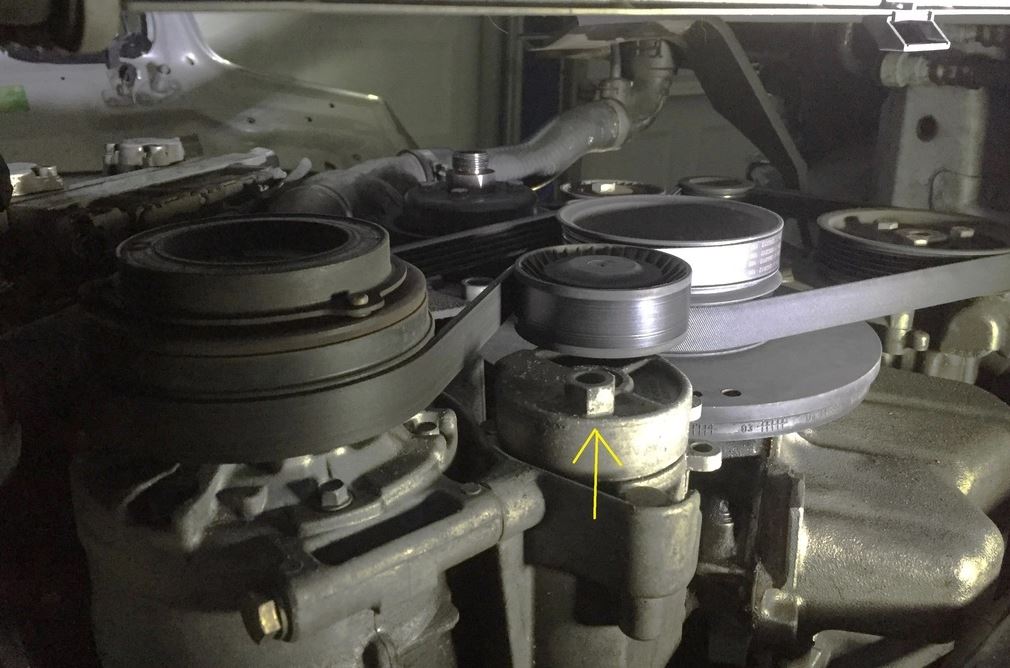
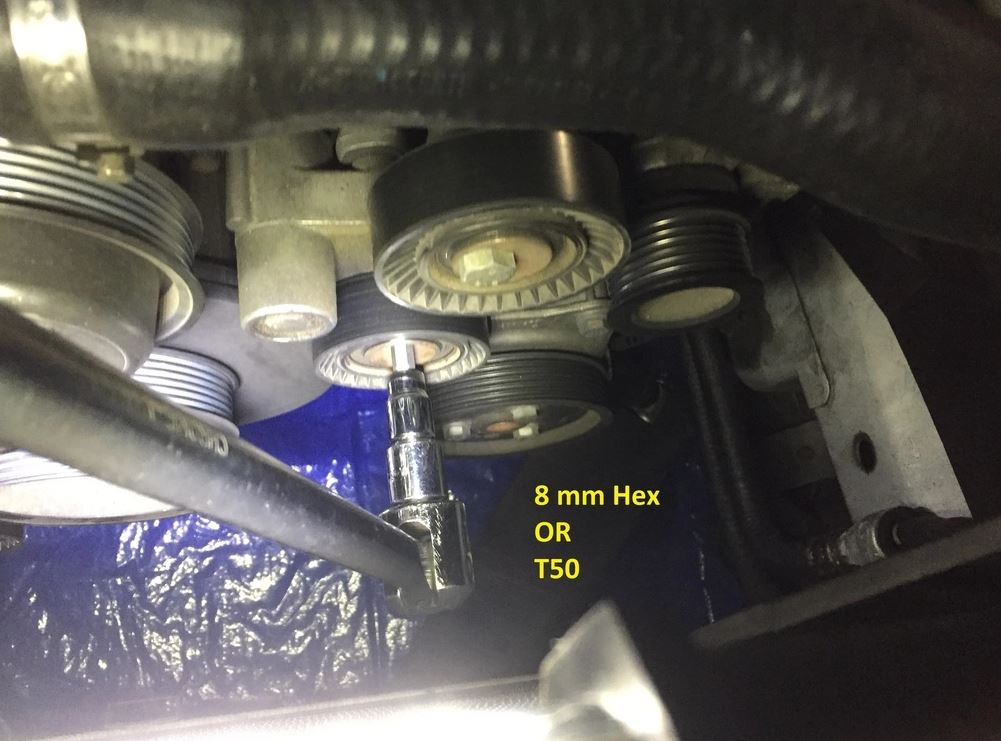
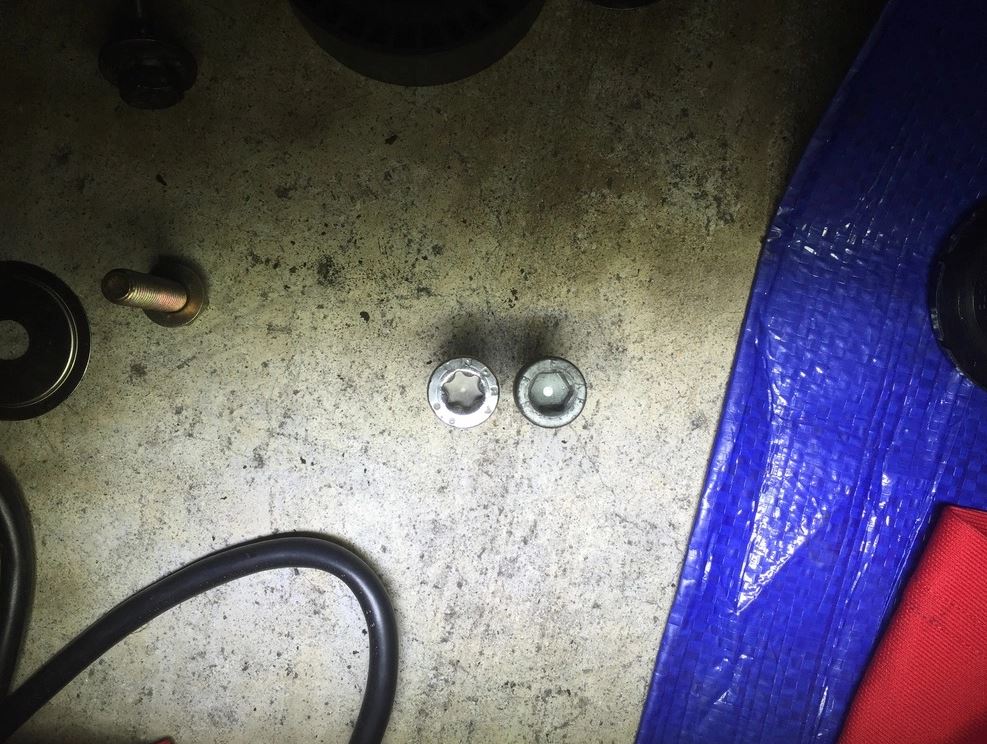
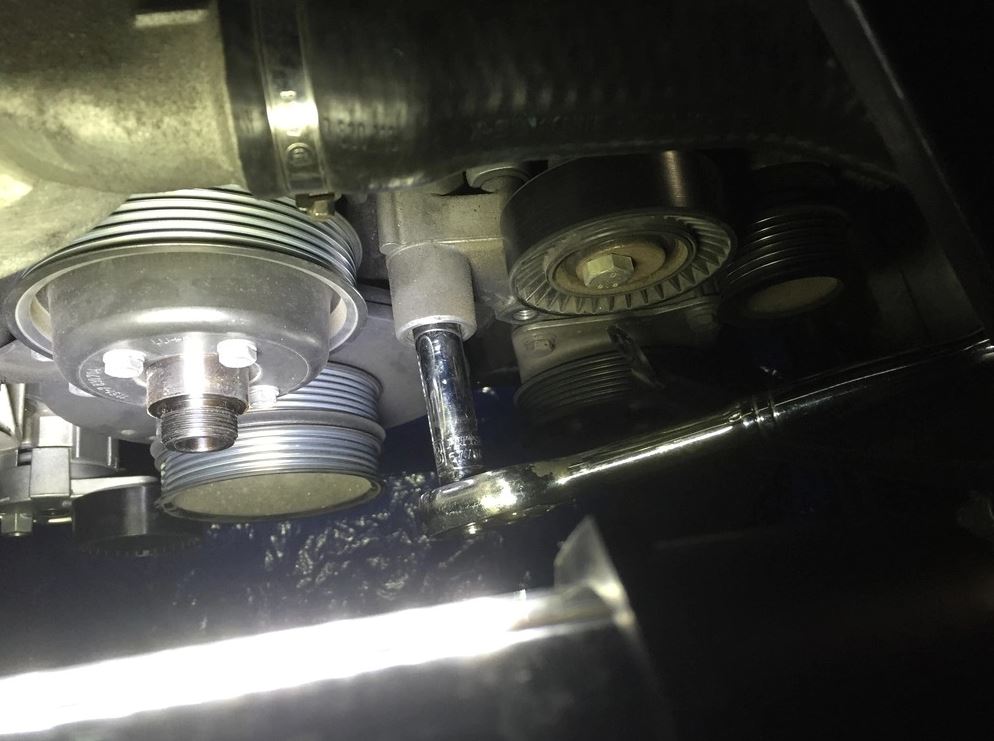
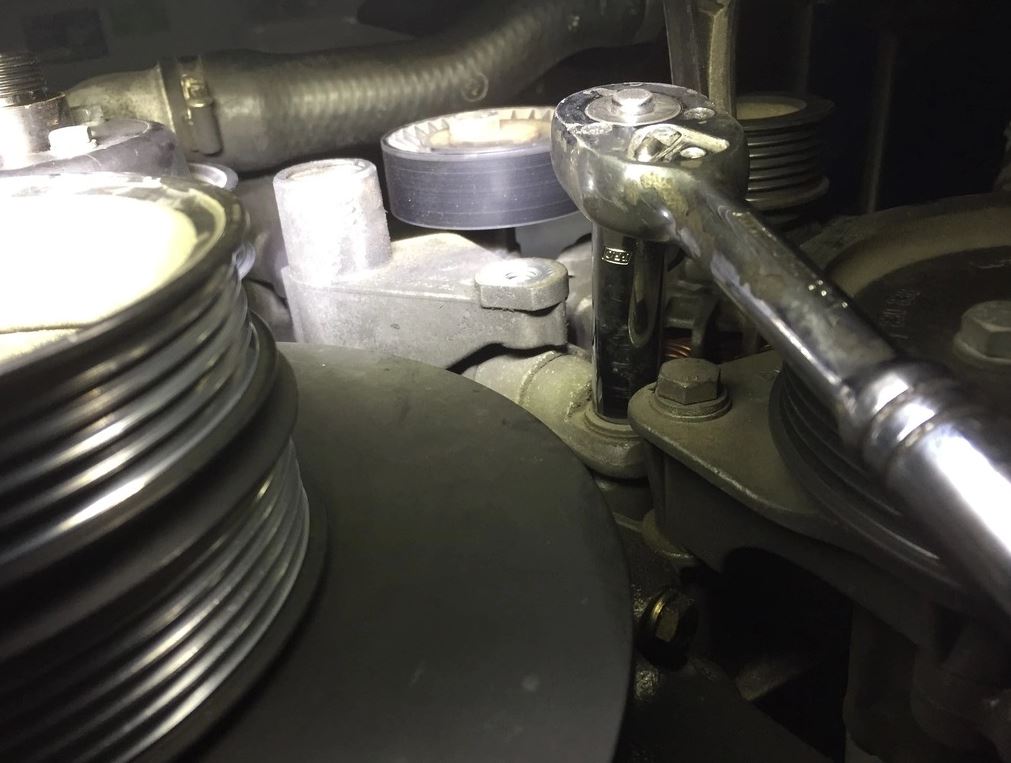
8. Turn the tensioner pulley bolt CW to de-tension the main belt, and remove the belt. Unlike the AC tensioner, you do not need to line up two holes and insert an Allen key for this one. The bolt uses either an 8mm hex key or T50 torx. Visually check which one yours is, and if you can’t tell, try using the 8mm first, then T50. My old bolt was 8mm hex and new was T50.
If you are replacing the tensioner pulley and/or tensioner itself, you will rotate the same bolt CCW to remove it. This will allow you to remove the pulley. If you are replacing the tensioner, move on to Step 9. If you are not replacing the tensioner, install the new pulley and torque to 38 Nm (28 lb-ft). Replacement of the idler pulley is detailed in Step 10.
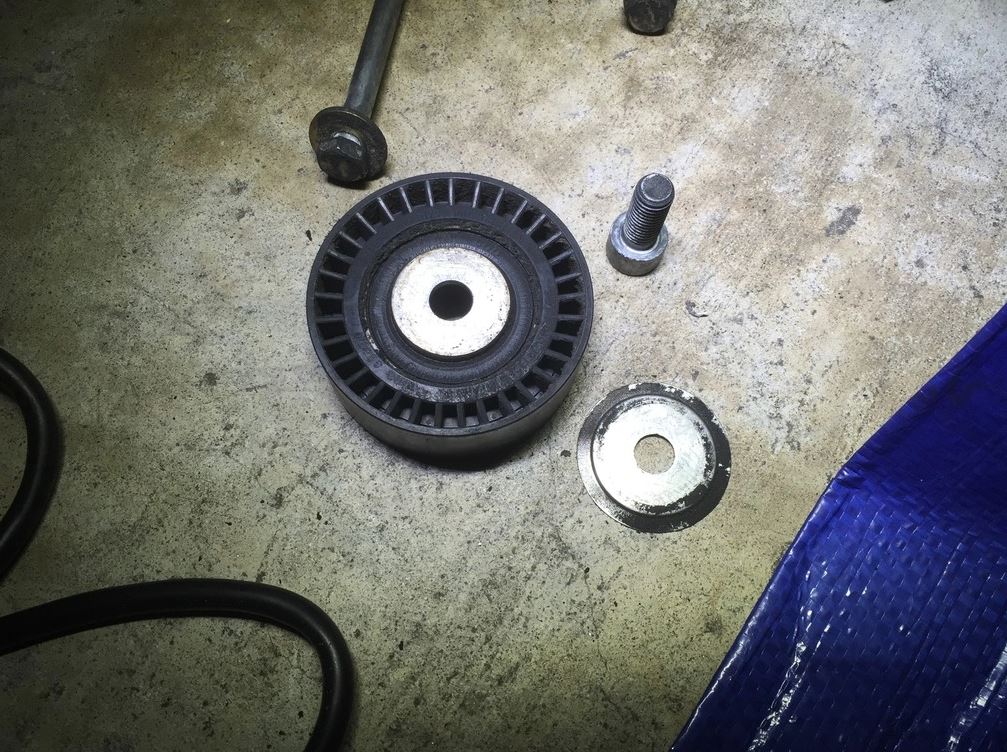
Note the position of the dust cover. You should see an impression, not a depression; reinstall it that way.
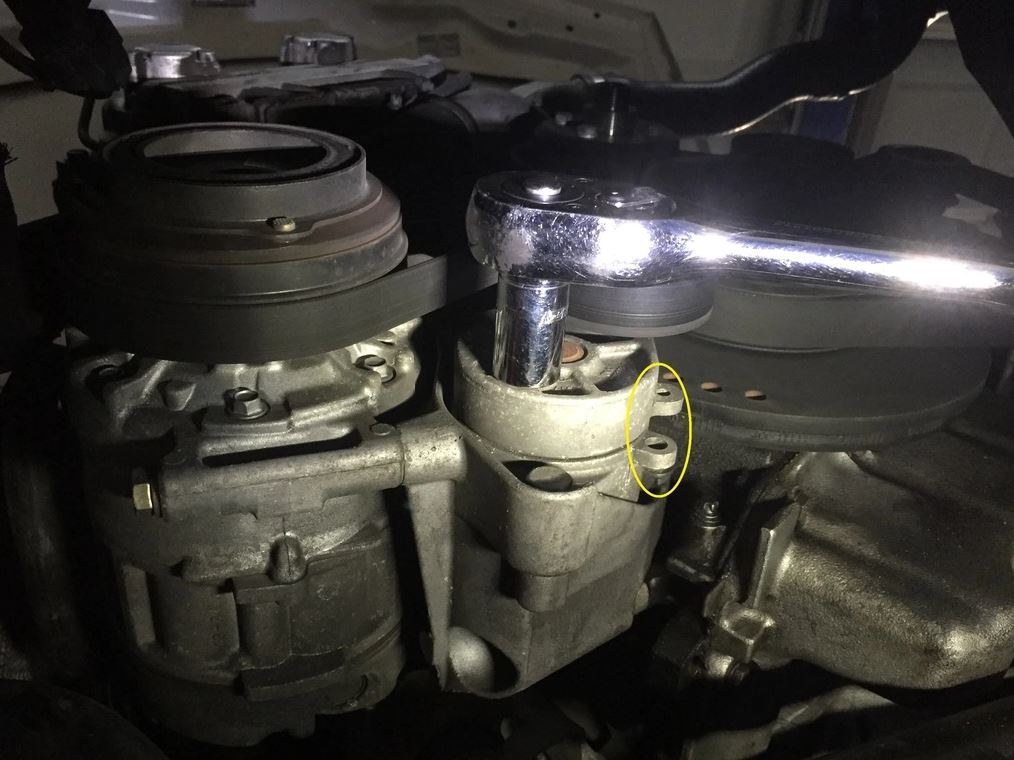
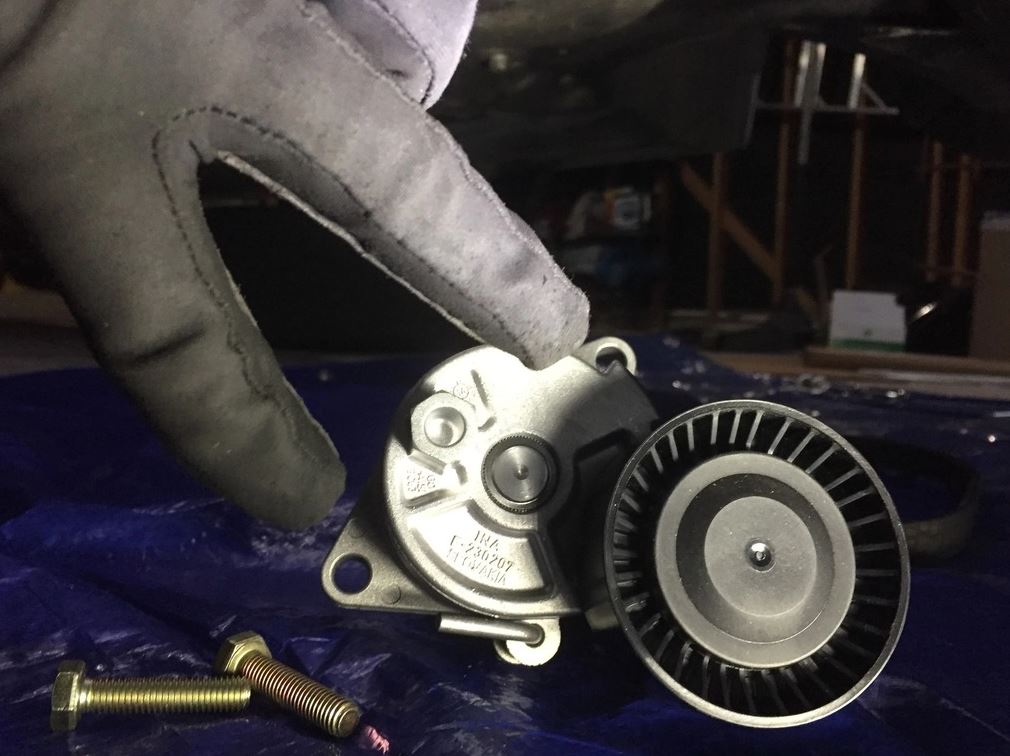
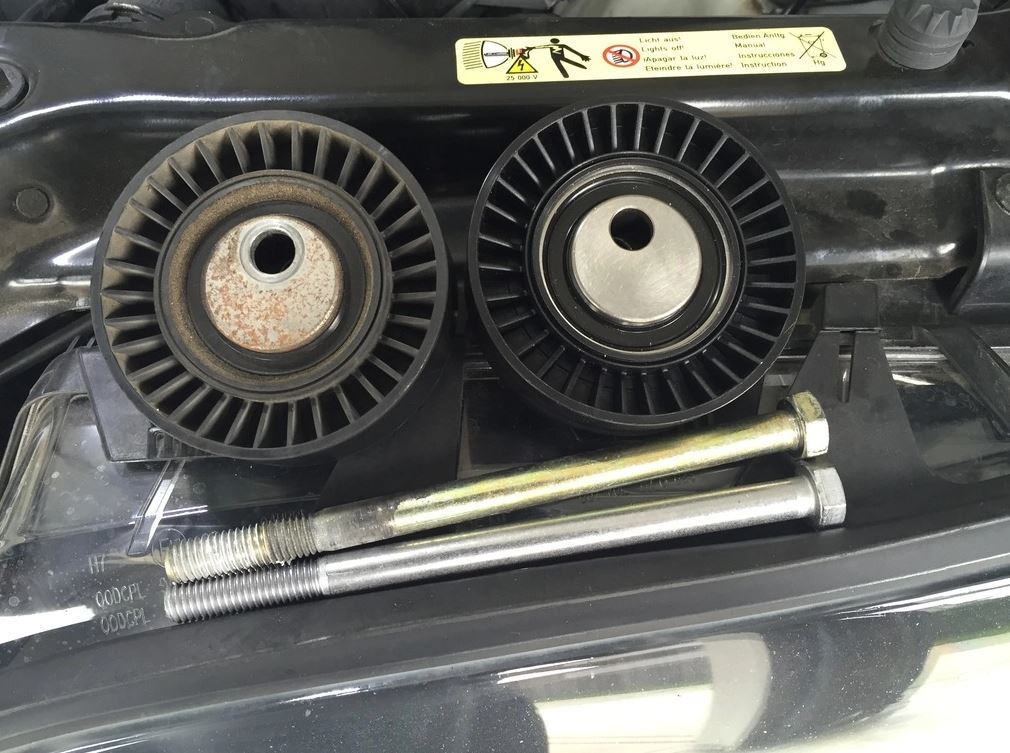
9. Removal of the tensioner requires you to remove three 13mm hex bolts.
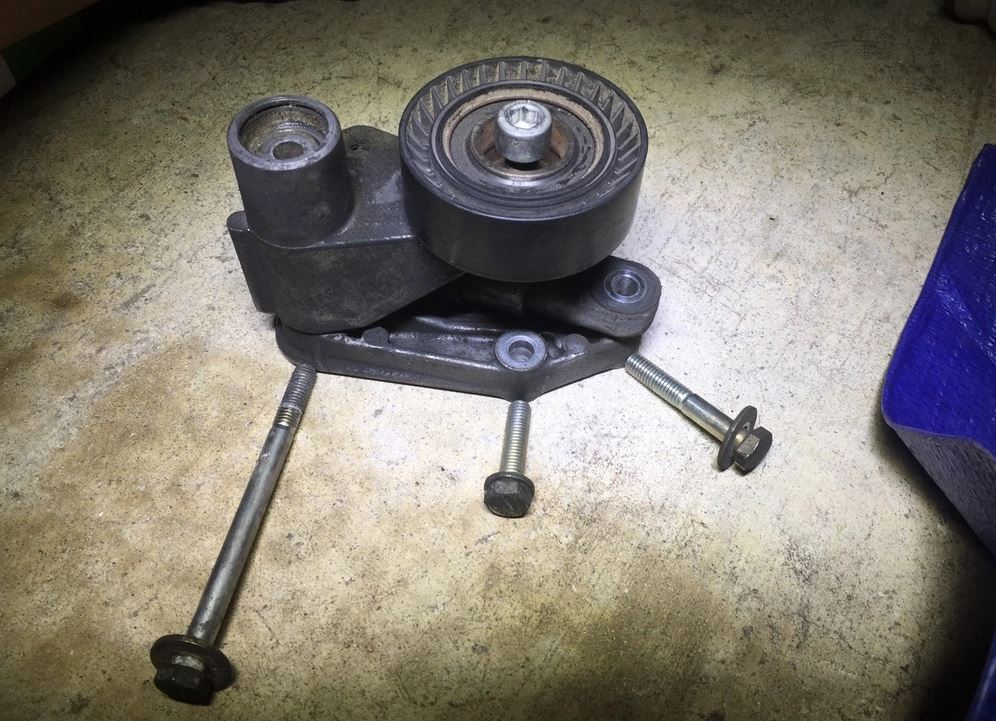
One
Two
Three
New vs old
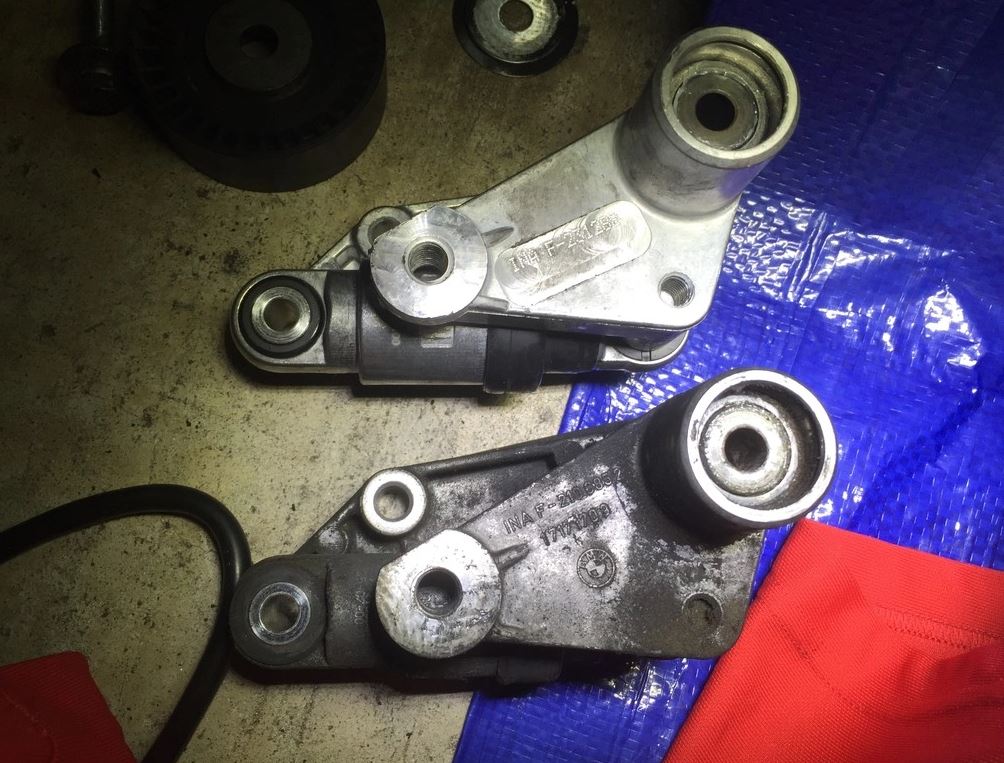
Install the new tensioner and torque the three bolts to 24 Nm (17.7 lb-ft). When installing your pulley, ensure that your dust cover is positioned so that you see an impression. Torque the pulley bolt to 38 Nm (28 lb-ft).
Day 2 because I didn’t feel like finishing up at night. My OCD was killing me in the morning, so I had to clean up and organize the work area before continuing any work.

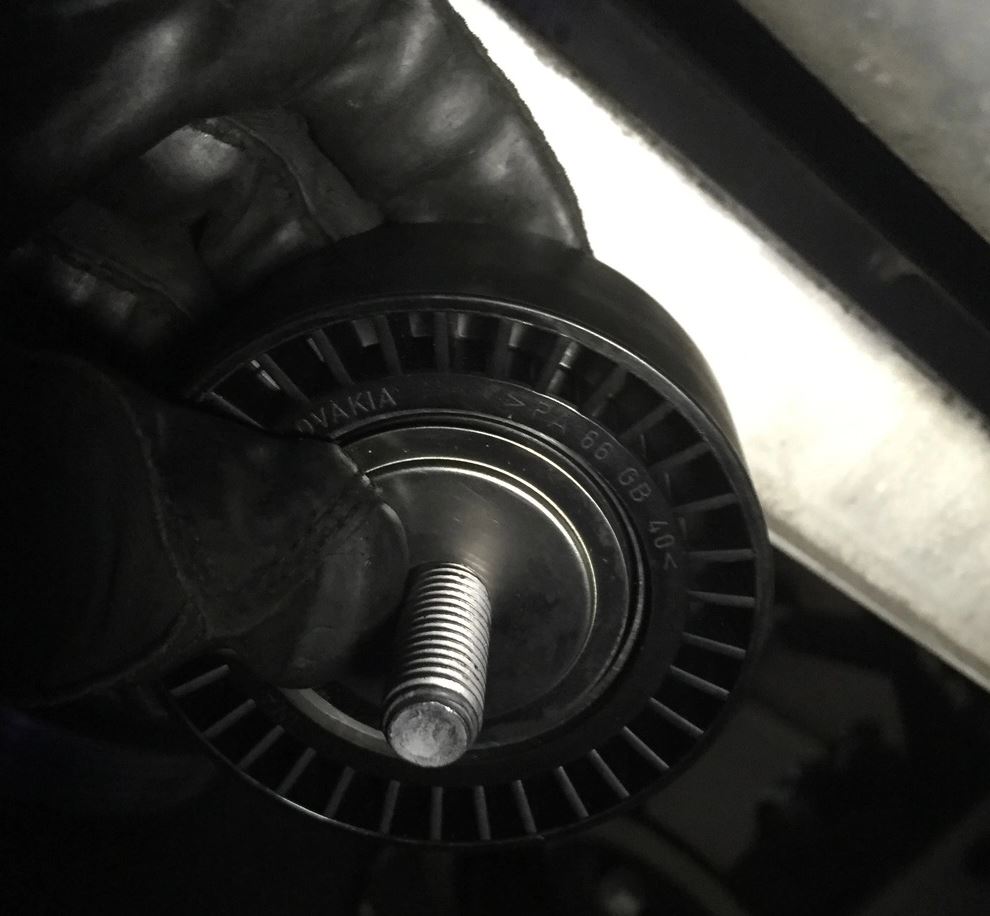
10. Remove and replace the idler pulley. Torque the bolt to 38 Nm (28 lb-ft).
We will be reversing the steps to put the car back together now.
11. Install the main belt and do it correctly the first time, or bad things may happen.
12. Put the dust caps back on. Blue arrow points to the tensioner pulley cap.
13. Install the AC belt, and add tension to it.
14. Install the cooling fan and fan shroud. They must be lowered in behind the radiator together; do not drop the fan. Firmly tighten the fan, but do not go all gorilla on it. The rotation of the fan will prevent it from unthreading. The fan shroud is secured by two tabs and four T25 torx screws at each corner (yellow circles and arrows). The long screw is for the top right corner.
15. Plug in 1, and put 2 back in its harness.
16. Install the two shroud ducts. Blue first, then yellow.
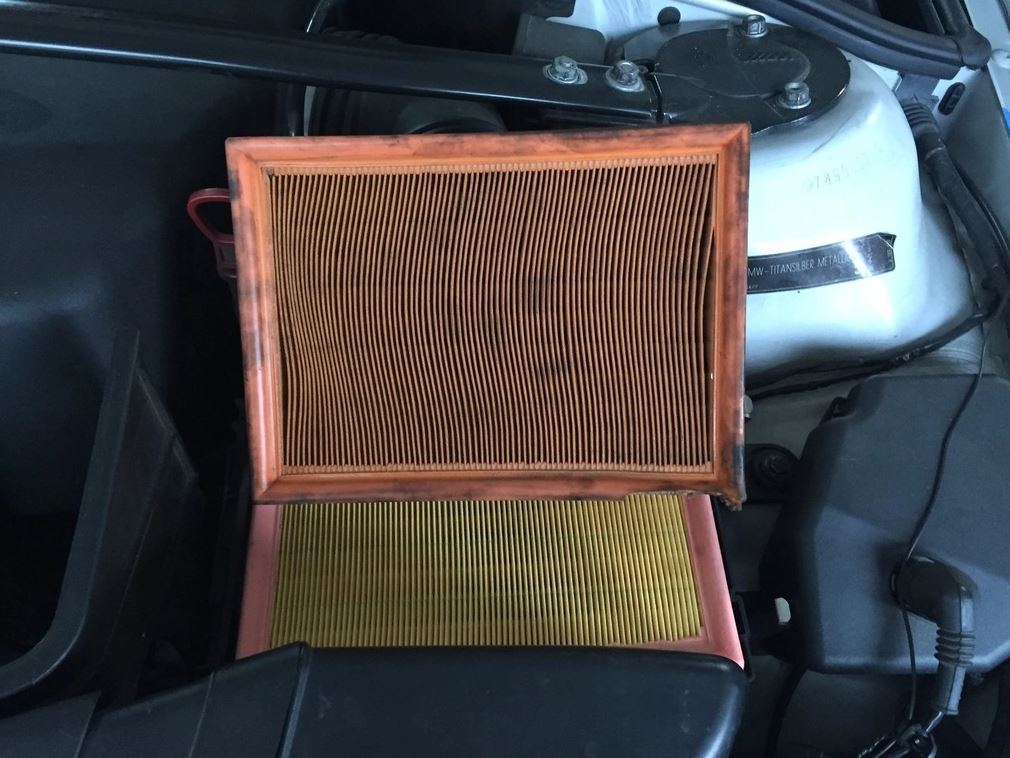
17. Install the airbox. You have two 10mm bolts on the side of the box, the hose clamp, MAF, and four plastic rivets for the suction hood. I replaced my filter because it was dirty and torn up. Should’ve replaced it right after I bought the car 3 years ago… At this point, I started the car and let it run for a few minutes to see if there were any issues.
18. Install the oil cooler. It is secured with two T25 screws.
19. Install the plastic undertray.
20. Lower the car.
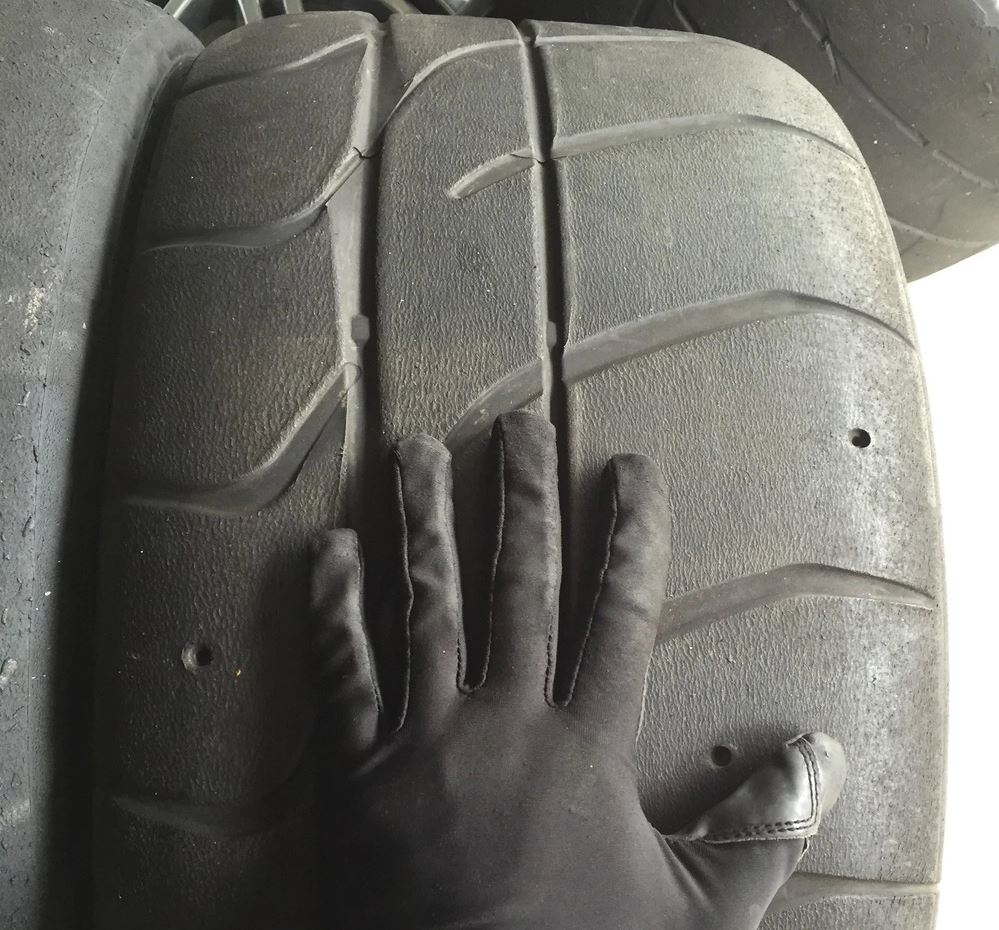
I also did a tech inspection and had Nitto NT-01s mounted on my wheels before lowering the car in preparation for an upcoming track event.
Done!

