
Hello, fellow Porsche enthusiasts! Have you discovered a problem with your Porsche Macan’s handling or a squeak/knock that’s causing you to lose your groove? It could mean that your upper control arm pleads for tender loving care. This clever component of your suspension system is critical for maintaining tight steering and securely planted wheels on the road.
We will get right to the heart of the Porsche Macan upper control arm repair in this guide. When it’s time for a repair, we’ll show you what tools you’ll need and how to do it step by step. Then you’ll be back to sailing in no time. Ready for your wrench? We’re about to start a trip that will teach you how to take care of your Porsche Macan like a pro!

Porsche Macan Upper Control Arm — Explained
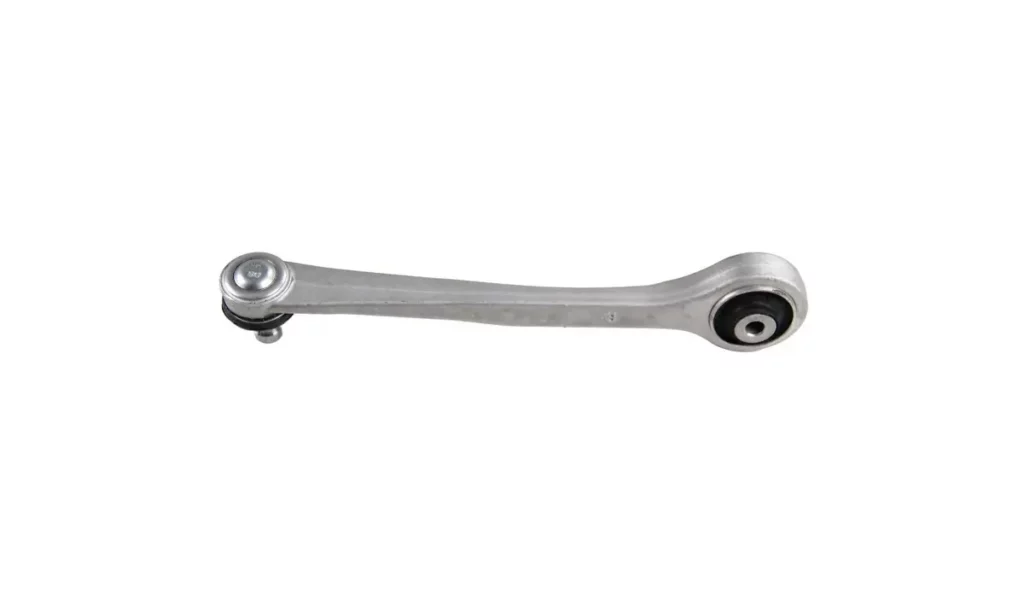
Beginning with a fundamental understanding of the Porsche Macan upper control arm is crucial. This integral part of your car’s suspension system is the linchpin that connects the chassis to the wheel hub, ensuring tire alignment and stability. It works in concert with the lower control arm to facilitate the vertical movement of the wheels over varied terrain. It is indispensable for maintaining precise wheel alignment — a hallmark of Porsche’s engineering prowess.
However, the upper control arm in your Porsche Macan has inherited a distinctive suspension design from its Audi relatives, one that prioritizes handling finesse. This design places a greater amount of stress on the rubber bushings, especially when steering deviates from a straight line. Unlike a conventional suspension that stresses bushings axially, this design exerts stress laterally as well. It was introduced by Audi in the A8 around 1994 and adopted in subsequent models, including the Porsche Macan.
Such stress can lead to premature wear of the bushings, often indicated by surface cracks that can appear as early as 20,000 to 30,000 miles. Although Porsche/Audi deems these cracks to be within normal expectations, they are precursors to deeper wear, leading to potential clunking sounds and compromised alignment as the vehicle accumulates mileage.

When symptoms such as unusual tire wear, audible squeaks, knocks during bumps, or the vehicle pulling to one side manifest, it signals the need for inspection and possibly repair. These symptoms clearly indicate that the upper control arm may require attention.
Replacing the upper control arms isn’t merely a routine repair, it’s an essential step in preserving the integrity of your vehicle’s handling characteristics. Undertaking this repair is a proactive measure to ensure your Porsche Macan continues to deliver the performance and driving experience that Porsche is known for.
Thus, with the right approach and understanding of your vehicle’s suspension system, you can confidently address the maintenance needs of your Porsche Macan’s upper control arm. Ready to proceed?
When to Replace Your Porsche Macan’s Upper Control Arm
If you’re experiencing any of these symptoms, it’s likely time to consider a repair. This can happen as low as 20,000 to 100,000 miles, it really depends on your driving style and the road conditions. Here’s what to watch for:
Steering Wheel Vibration
If the steering wheel vibrates, especially when you accelerate or hit the brakes, it’s a signal that the control arms might be wearing out.

Irregular Tire Wear
Take a look at your tires. If you notice uneven wear, particularly on the inside or outside edges, it could indicate that the control arm is failing to hold the wheel steady.
Loose Steering
A loose or wandering steering feel is another red flag. It’s not just about comfort; it’s a safety issue that needs immediate attention.
Audible Clunking or Squeaking
Sound is often the most noticeable symptom. If you hear clunking or squeaking when going over bumps or when steering, it’s time to inspect the upper control arm.
Understanding when to service your Porsche Macan’s upper control arm ensures a smooth and safe driving experience. While it may seem daunting, with the right tools and some patience, it’s a task that can be tackled at home.

Pre-op Checklist for Your Porsche Macan Upper Control Arm
Before we jump into the nuts and bolts of the repair, let’s gear up. A successful DIY repair is all about preparation. You wouldn’t paint a masterpiece without your palette, right? So, let’s gather our tools and prepare that workspace for some Porsche Macan pampering.
Tools of the Trade:
- Working gloves
- Safety goggles
- Hydraulic Jack rated 2-ton
- Jackstand with a flat top rated 2-ton
- Cordless impact wrench
- Torx screwdriver T25
- Ratchet and socket set ½”
- Combination spanner set
- Wooden blocks
- Penetrating oil spray
- Ball peen hammer
- Center punch tool set
- Torque Wrench
Before we begin, safety is the name of the game. Ensure your Porsche Macan is parked on a flat surface and your parking brake is as engaged as you are in this repair. Use quality jack stands to support the vehicle because, trust us, you don’t want a two-ton Porsche playing patty-cake with your undercarriage.
Clear out a nice spot in your garage or driveway. You’ll want enough room to move around comfortably because nobody likes playing Twister while working on a car. Lay out your tools within arm’s reach, and maybe have some tunes playing to set the mood. Repairing your Porsche Macan should feel like a dance, not a duel.
Finally, brace yourself for a bit of a challenge. It’s okay if you’re not the most experienced wrench in the tool shed. What matters is your willingness to learn and take it step by step. Think of it as a puzzle where each piece you put in place brings you closer to victory.
Prepped and psyched? Check. Tools and workspace ready? Double-check. Let’s roll up those sleeves and get to the fun part — the repair itself. Next stop, DIY glory!
Porsche Macan Upper Control Arm Replacement

With those tools ready and your work area secure, let’s begin the replacement of the upper control arms to restore your car’s performance. Follow this in-depth repair plan, and you’ll not only feel like a professional, but you’ll be handling the job like one. Don’t forget to don those gloves and goggles — safety is key, and they’ll have you looking the part, too!
Raise the Car Off the Ground
The first step of the plan is to secure the car on the jack stands. If your car is equipped with an air suspension, you will have to put it on service mode first. To do this, you must start the car and keep it on idle. Then press the switch for suspension adjustment and hold it there until an information message — “Level adjust. Switched off” pops up on the cluster. Then you can switch off the engine and continue your work.
Time to raise the car up! Grab your hydraulic jack and place it under the car. Locate the jacking points of your Porsche Macan along the running board. It should be rectangular in shape and can either be made of rubber or metal — depending on the equipment. Then, place the hydraulic jack right under it and start to lift off your car. By the way, if you don’t have an impact wrench, you might want to start loosening the lug bolts on your wheel half a turn before it leaves the ground. It will make your DIY repair a lot easier later on.

Just next to the jacking point, you will find an access cover with two T25 screws that must be removed. Remove this to access the jackstand points on your car. This is actually a lifting point when your Porsche Macan moves in the factory. Just make sure to keep the nearby pipes and lines from getting squished. Place the jack stands under the jack standpoints and lower your car. Give it a little nudge to see if the car is securely raised and won’t fall. Better to be safe than sorry!
Removing Wheels
Got the car securely raised? Start to remove these wheels. A quick tip: to remove the wheels properly, you need to gather some tools on your car located at the trunk, under the floor cover. Get the wheel guide and wheel lock key — if your car is equipped.
Remove the lug bolts in a star pattern and install the wheel guide. If the wheels feel like they were seized on the hub, feel free to give it a bit of a hit to loosen it up. Depending on how bad the corrosion is, it might take considerable force to loosen it up.
Remove Upper Control Arms
Alright! The wheels have been removed, and you are now ready to swap those upper control arms. Locate the pinch bolt on the wheel hub carrier. Loosen and remove its nut. Next, locate the nuts on the upper control arms loosen and remove those as well using a combination wrench.
The pinch bolt can be a pain to remove, especially if it is over-torqued and corroded. To get around this, spray a penetrating oil on it and let it soak. Turn the bolt a couple of times, then use a 5mm shank punch tool and a hammer to push the bolt out of the wheel hub carrier. When the bolt is removed, the wheel hub carrier will fall sideways. Make sure to support it using a wooden block.
The hard part is done; next, the bolts on the other end of the upper control arms are to be removed. This will be a lot easier compared to those pinch bolts. Once all the bolts have been removed, the upper control arms can now be guided out of their mount. There you have it! Upper control arms are now removed.
Installing it Back Together
Okay, now for installing it back. Most of the steps that we have done just need to be done in reverse. These are just a couple of things that you have to keep in mind. First off! All nuts and bolts that have been removed should be replaced.
Next, tightening torque! The pinch bolt needs to be tightened to 33 ft-lb (45Nm), and the bolt that holds the forward and rearward upper control arms to the mounting saddle needs to be tightened to 37 ft-lb (50Nm) and then 90° torque angle.
Keep in mind that the tightening of the said bolts should be done when the car is standing on its own wheels. So, you have to lift the wheel hub assembly until you measure 479mm (steel spring) and 464mm (air spring) from the center of the wheels to the lip of the fender.
Once everything is done and all bushings seem to be in good condition, you will have to perform a wheel alignment on your car. I suggest letting a professional do this, as you might not have a wheel alignment machine in your garage. Right?
Test Drive
Take your Porsche Macan for a gentle spin. Listen for any odd noises, feel for any weird vibrations, and make sure the handling is as sharp as it should be. If everything checks out, congratulations! You’ve just completed a top-notch upper control arm repair. If there’s still something off, don’t sweat it — troubleshooting is the soul of DIY.
Check your work, consult the forums, or ask a fellow Porsche aficionado. Remember, every repair is a learning experience and a story to tell at your next car meet.
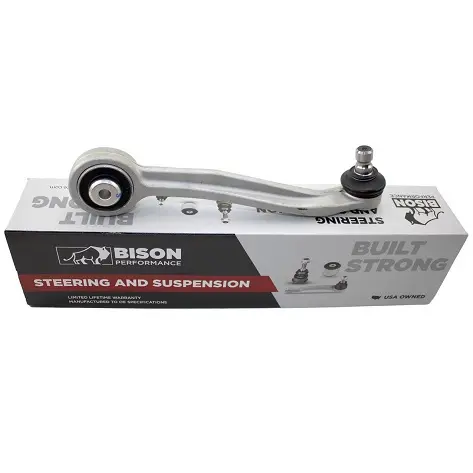
Quality Parts for your Porsche Macan
As we close the hood on our Porsche Macan upper control arm repair journey, let’s not forget the unsung hero of any successful DIY project: the parts themselves. You’ve got the know-how, the can-do attitude, and now all you need are the best parts to get the job done right.
That’s where eEuroparts.com comes in. They have you covered if you want that perfect-fit upper control arm or any other quality components to keep your Porsche Macan purring like a contented cat. With an easy-to-use website and a large selection of high-quality parts, eEuroparts.com is your one-stop shop for all things Porsche.
So go ahead and fuel your DIY spirit by going to eEuroparts.com right now. Get the parts you need to keep your Porsche Macan not only running but also running with precision and passion. Because when you choose the right parts, every drive is a victory lap.
Click, shop, and conquer — your Porsche Macan is counting on you!
