

Hey, fellow Porsche fan! So, you’ve got a Porsche Cayenne 958 equipped with an Air suspension system, huh? What a machine! Aren’t you lucky? With that ride, you will cruise those city lanes and rugged terrains in unparalleled comfort!
But even the finest of vehicles have their off days! Picture this: you’re walking up to your Precious Cayenne, and it’s looking a bit…low? It’s not that your car suddenly turns into a low rider! Yeah, I know! A low-rider setup is cool, but not for a Porsche Cayenne.
Yep, we’re talking about that pesky “suspension sagging” issue. But fret not! We’re here to fill you in on why your Porsche Cayenne 958’s suspension is feeling down. And how to lift its spirit!
How Does the Air Suspension System Work in Your Porsche Cayenne 958?
Say goodbye to those old-school steel springs. In their place? The Air suspension system is rocking air springs, often dubbed airbags. Picture these airbags like adaptable sneakers, tweaking their cushioning in real time. Whether you’re casually cruising the city or tackling tough trails, they got you, adjusting to keep things silky smooth.
You might be asking yourself, who’s the mastermind that decides when it’s time to inflate or deflate those airbags? Well, meet the height sensors! Imagine them as your Cayenne’s super attentive guardians, constantly making sure everything’s sitting just right. And then there’s the solenoid valve unit — this guy’s job is to regulate precisely how much air each airbag gets. Pretty cool, right?

Packed the trunk with a ton of suitcases? The sensors spot the rear dipping and quickly buzz the Porsche Active Suspension Management (PASM), going, “Hey, buddy, pump it up!” PASM obliges, cranking its air compressor, and with the help of the solenoid valve unit, it will fill up those bags with compressed air in the reservoir, getting the Cayenne back in form.
But if you unload those suitcases? Suddenly, the car’s sitting a bit high. Those observant height sensors chirp in, “Looks like we’re a bit lofty.” PASM, always on its toes, reduces the air from those bags by reversing the process, making sure the Cayenne keeps its suave balance.
Here’s where you get the director’s chair. Fancy a change in height? You’ve got the controls! But, here’s the twist: when you speed up, the Cayenne dons its captain’s hat, saying, “Leave it to me!” It auto-selects the ideal height for that pace, guaranteeing safety and comfort.
So, as you bask in that unbeatable driving experience, just think of the clever mechanics beneath, tirelessly working to perfect every moment. Pretty rad, right? That’s the magic of your Cayenne E2’s air suspension!
Evident Signs of Defective Air Suspension System
So, you might’ve noticed your Cayenne’s got a bit of a low-rider swagger lately. That’s one big giveaway. But guess what? The drama doesn’t end there. There’s a whole cast of clues hinting that your air suspension might be throwing a little tantrum. Before you jump to conclusions, take a step back and play detective. Watch your ride closely and check if it’s showcasing any of these signature moves from our not-so-secret list. Let’s roll!
Multiple warnings on the dash
“Chassis System Failure,” “Chassis System fault,” “PSM fault.” These warnings could appear on your dash if you have a defect in your air suspension system. In some cases, if the air suspension system is just starting to act up, you could have these warnings too: “Regulation Not Permissible” and “Pressure Accumulator Charging.”
Lift takes time or not working at all
Some of us do really know how our car behaves. If something is wrong, you will not hesitate to think, “Hmmm, that is not how it is supposed to be.” In this case, you will notice that the suspension will still be lifted; however, it takes its own time. Worst case, it will not work at all. If that happens, those words will come out of your mouth, right?
Continued humming noise from the air compressor
Do you have a sharp ear? Well, channel that skill when you’re near your Cayenne. Lean in and catch the little hum — that’s the compressor doing its thing right beneath the front right passenger seat. Now, if that soft hum suddenly sounds like it’s had one too many cups of coffee and is working overtime? Ding ding! Something’s up. It shouldn’t be trying to belt out its greatest hits – louder isn’t always better in this case.
What Could Go Wrong with Your Air Suspension?
So, the air suspension system? It’s kind of like a rock band with many members. And while each part plays its own tune, some are, unfortunately, more likely to hit the wrong note. So, let’s jam about the usual suspects — the parts most likely to throw your air suspension off its rhythm.
Strut assembly leak
Hey, recall those air springs we chatted about? Bingo! They’re buddies with the shock absorber, sealed tight with a few O-rings. But hey, nobody’s perfect! Over time, these O-rings might start feeling a bit under the weather and let some air sneak out. And sometimes, the shock absorber might spill its drink (I mean, fluid), which isn’t good news for those O-rings either. Oh, and about the airbags? They’re made of rubber. Just like that old rubber duckie in your tub, they too can show wear and spring a leak.
Air compressor leak/defect
Alright, imagine this: your air suspension system has sprung a leak (not cool!). This can stress out the air compressor, making it work so hard it’s practically sweating bullets! Overworking can get it all hot and bothered, and when that happens? Those seals and gaskets in there might throw a little tantrum. And if they do, the air compressor can start slacking off or freeze up the whole operation from the inside.

Electronics Air Suspension Issues
Hey, you know how complex gadgets can sometimes act up? Same thing about air suspension systems! They’ve got all these electronic bits and pieces. The big baddie among them? The air compressor relay. Like I said, if those struts get a sneaky leak, the compressor works overtime. That’s like making your grandma run a marathon! So then, the relay gets all stressed out and might just throw in the towel.
Imagine this: your compressor gets stubborn and keeps draining power until – BOOM! – that 40A Maxi Fuse says “no more!” From a tiny strut leak, you’re now dealing with a busted compressor, a grumpy relay, and a fuse that’s had enough. Wild, right? It’s like missing a tiny snowflake and then getting buried in an avalanche!
Oh, and don’t even get me started on the height sensors! These little guys are out in the wild, not really hidden away. I’ve heard tales of our little friend Jerry (yes, the mouse from “Tom and Jerry”) nibbling on them. And on super chilly days, they might even get all iced up and snap. Yikes!
Guess what? The solenoid valve unit isn’t invincible either – it can break down, too! Made up of these itty-bitty air valves and a pressure sensor, things can get clogged up if they’re not running smoothly. Especially if the compressor decides to throw a tantrum and seize up, you might find tiny metal chips going on a journey right to the solenoid valve unit, messing up those delicate valves and the pressure sensor. Talk about a tiny troublemaker, huh?
Bottom line? Don’t sleep on those small issues. Tackle them early, or your wallet’s gonna feel it big time. It’s like that wise thing grandma always dropped: “Better safe than sorry!”
Compressed air lines
Alright, get this — it’s super rare, like seeing a unicorn rare, but those air lines coming from the compressor? Yeah, they can start leaking, too! Sometimes, they get all squished, poked full of holes, bent out of shape because of a bump, a fender bender, or maybe just a not-so-great repair job. And believe it or not, we’ve even heard stories about Jerry deciding to have a taste of them, too! Crazy, right? So yeah, it’s wild stuff, but it happens!
Fix That Sagging Air Suspension!
Alright, all you wrench warriors and gearhead gurus, you’ve got the lowdown now, right? When these little oops moments strike, it’s all about arming yourself with the right tools, a touch of zen, and maybe even some cool upgraded parts to give your ride that extra oomph. So, let’s raid that toolkit and get ready to turn some wrenches!
And hey, big shoutout for hanging with us through those not-so-glamorous boring bits. Your patience is rock solid, and we love that about you! Whether you’re here for a quick fix or in the mood to give your car a little extra love with an upgrade, you’re in the right place. Let’s roll up our sleeves and get down to business!
- Battery charger rated at least 20A
- OBD diagnostic tool
- Hydraulic jack rated 2-ton
- Jack stands rated 2-ton
- ½” ratchet and socket set
- Flare nut wrench set
- Ball joint puller
- Torx set — key or socket
- Combination wrench set
- Tank of UHP grade 5 nitrogen
- Plastic trim removal set
- Inspection light
- Mechanic’s creeper
- Working gloves
- Safety goggles
Alright, now that we’ve got that out of the way, let’s ensure you’re all set up in a safe spot and have the right tools in hand. And hey, don’t forget to gear up with your safety equipment — we’re talking goggles, gloves, the whole shebang! After all, we want you to walk away from this in one piece.

Oh, and give a heads-up to anyone nearby about your master plan. We don’t want any surprise guest appearances in your work zone, do we? You’ve got this — after all, you’re the boss, the grown-up in charge! Let’s do this, but let’s do it right and safe. Cheers to being awesome and responsible!
Hold on a sec — let’s not forget this golden rule: Keep it squeaky clean, folks! With all the tiny pathways for air through the pipes and all the inner workings of the air compressor and solenoid valve unit, even the tiniest bit of dirt can throw a wrench in the works. So let’s keep it all spotless, alright? Just a little heads up for smooth sailing!
Alright, team, before we jump in, let’s hoist that car up on jack stands and pop off those wheels — we’ve actually covered this topic in our lower control arm article, and trust me, it’s a pretty fun read! Once that’s done, you’re on to venting the air suspension to ensure those struts are air-free and ready to rock!
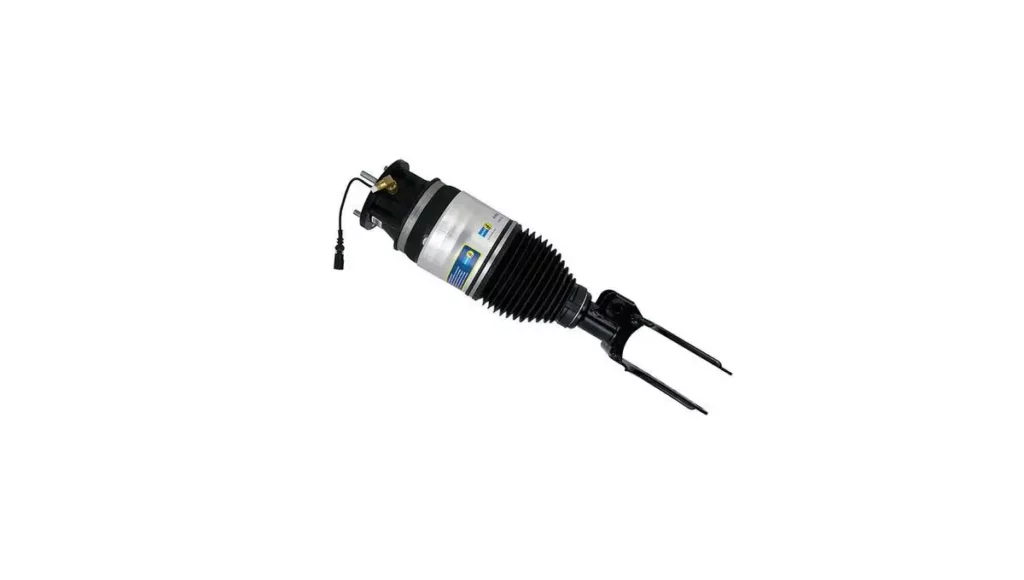
Strut assembly replacement
If you have a leaking strut assembly, there are two ways to fix it. You can replace only the air spring itself or the complete air suspension strut assembly, including the strut. Either way, if you are to proceed with any of those fixes, it is recommended to replace them in pairs. You don’t want to fix the left side first; a month later, the right side gives in. Additionally, do not drive your Cayenne while it is lowered due to a leak. It can damage the remaining good air springs.
Replacing the air suspension front strut assembly
Locate the stabilizer links on the wheel well area and remove them using a ratchet and socket or a combination wrench. Next, disconnect the air lines using a flare nut or open-ended wrench. Then, you’ll have to loosen the nut on the upper control arm and disengage the ball joint using the puller. The hub carrier will then hang outward, supporting it with a wooden block or anything to prevent your drive shaft, brake line, and wirings from being stretched out.
You will then have to loosen the lower strut nut. Keep the bolt in there so the strut assembly won’t fall accidentally once you proceed. In the next step, on the engine compartment area, you will have to remove the three upper strut mount nuts. Remove the shock absorber electrical connection as well. Then, back to the wheel well area, remove the lower strut bolt. Guide the air spring strut assembly out, and that’s it!

Replacing the air suspension rear strut assembly
For the rear strut assembly, you will have to open up the rear boot and remove those flooring covers. Remove the left and right trim by removing the floor cargo net hooks. Push it forward, then lift it off. The next step is to locate and remove the four screws that hold the air spring struts.
At the wheel well area, locate the air line and remove it from the air spring strut. Next is to disconnect the shock absorber electrical connection. Finally, remove the lower strut bolt and guide the air spring strut assembly out of the wheel well area.

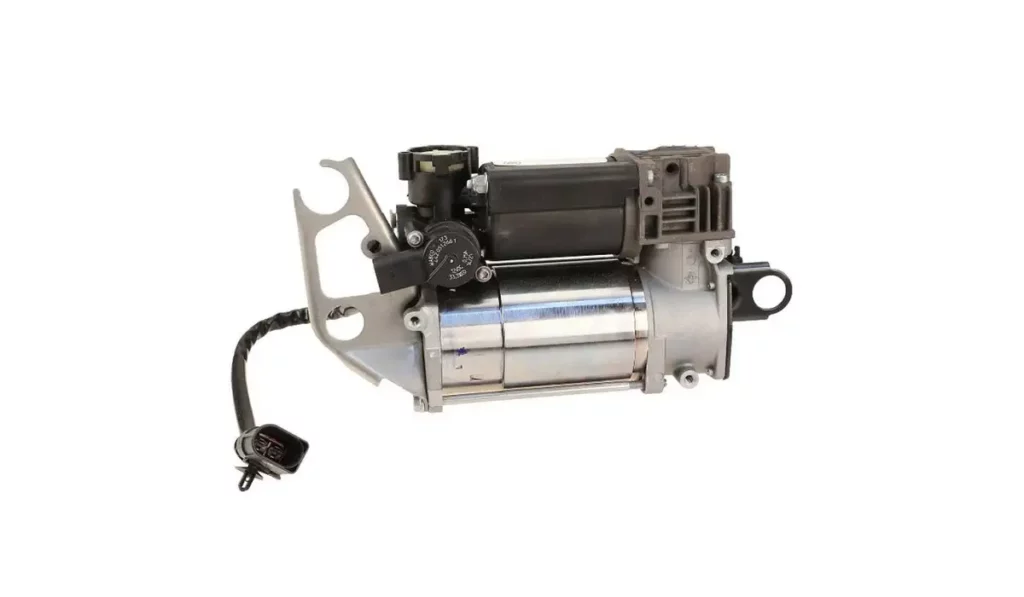
Air compressor replacement
Replacing the air suspension air compressor
First things first, we need to take off the right-side running board inner cover. Don’t worry, it might sound fancy, but it’s pretty straightforward. Depending on your car’s model and extras, you might find a plastic or aluminum cover there. Once you’ve got that out of the way, you’ll spot the air compressor sitting snugly just right about under the front right seat.
Now, grab a flare nut wrench or an open-ended wrench, and let’s get those air lines off the solenoid valve unit. They are color-coded, so you’ll not get confused about which pipe goes to which connection. And remove those wire sockets too! And here’s a little heads up — the compressor and the valve unit, they are like best buddies; they come out together as one.
Got everything out? Great! Now comes the part where you play mix and match, transferring all the little bits and bobs from the old compressor to the shiny new one. We’re talking wires, pipes, those squishy rubber mounts, mounting brackets, and yes, the solenoid valve block too. Let’s get all that swapped over and you’re golden!
Electronic component replacement
Replacing the relay for the air suspension compressor
Replacing the relay will require bending over and going under the steering wheel. So, stretch out a bit; it will help. Remove the plastic trim under the dash using a Torx key. Once done, you will find the relay support 1. The relay for the air compressor is located there, position 1.
Replacing fuse for air compressor

The fuse for the air compressor is located on the left side fuse box panel. For this, you’ll have to open the door and remove the cover on the left side of your dashboard using a plastic trim remover. Once removed, you’ll see the 40A maxi fuse on location #56. Check if it is blown. If it is, just replace it! Just remember that the fuse is blown for a reason, so do not install a new one if that reason is not yet resolved. Otherwise, it will be blown again.
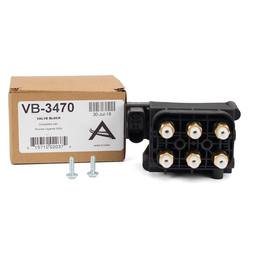
Replacing solenoid valve block
As I mentioned before, the solenoid valve block is attached to the air compressor. To replace this, you’ll have to pull down the whole assembly. Once removed, the valve unit can be removed from the assembly by removing the attachment screws. Quite straightforward, right?
Replacing height sensors
Replacing the height sensors is quite straightforward. You’ll just have to ensure the right part is installed in the right area and the sensor’s arm orientation is the same when you remove it.
Air lines repair
Locating the leak
Locating the leak will be either easy or hard. It really depends on what happened to your car. If your car has a recent fender bender as we talked about, the squished/punctured air lines should be near the damaged part. The hard part is locating the leak if a botched repair causes it or a vermin chews it off. You might have to pressurize the pipe to check if it is okay. Look for a pressure drop and a hissing sound to know if a leak exists.
Repair
Found the leak? Get an air line repair kit! It should be sized at 6mm and rated at least 145 psi. The repair itself is easy-peasy, too. Cut off the damaged section — Just make sure it is a clean cut. Install the new fittings, and that’s it!
Finalizing Repair of Your Air Suspension
Any of those repairs will have a concluding work. If you’ve opened the compressed air lines, you will have to fill up the air suspension again. You’ll then have to perform height calibration. So bring out your trusty OBD scanner and get it done. As for the relay and fuses, chances are you are replacing them with other components, so you will have to perform those steps too!
Air suspension system filling
Remove the right side running board cover. Once removed, you will find the tank reservoir right about under the driver’s seat. In the tank reservoir, you will find a filling port. Connect the nitrogen tank set to 245 psi to the filling port using a quick-release adapter from a manifold gauge — preferably, use a new tool so it won’t contaminate the air suspension system. Once done, use the OBD diagnosing tool to proceed with suspension filling. It’s that easy.
Air suspension height calibration
Using the OBD diagnosing tool again, proceed with the air suspension calibration function. Now, the OBD tool will ask you to provide the height measurement. This is to be measured from the center of the wheel to the edge of the fender while the car sits on its weight. Do that for all the wheels and enter it on the OBD tool. Once done, the air suspension is now successfully calibrated, and you are ready to go.
Find the Right Parts for Your Porsche Cayenne Air Suspension!
Wrapping things up on the Porsche Cayenne’s air suspension system, we’ve covered a lot from how it functions, tips on diagnosing issues, to getting down and dirty with repairs. It’s a complex system, but with the right know-how, you’ve got this! When it comes to getting your hands on quality parts, don’t hesitate to check out eEuroparts.com. With a reputation for quality and durability, their inventory ensures you’re investing not just in parts but in longevity and reliability for your Cayenne. Because when it comes to your vehicle, “Right Parts That Will Last!” isn’t just a statement; it’s a promise. Here’s to many more smooth rides on the horizon!
