
Welcome to the ultimate guide on keeping the heart of your Porsche 928 beating strong — the timing belt replacement! The Porsche 928, a beacon of engineering marvel and a symbol of automotive luxury, stands out as a masterpiece in the world of classic sports cars. Known for its distinctive design and robust performance, the Porsche 928 has carved its niche among enthusiasts and collectors. However, the key to preserving its legendary performance and ensuring its longevity lies beneath the hood, in a component as crucial as it is scary if overlooked — the timing belt.
In this guide, we’ll tackle the difficulties of timing belt replacement for the Porsche 928, highlighting why it’s paramount to stay ahead of this maintenance task. Whether you’re a seasoned Porsche aficionado or a new guardian of this timeless classic, understanding the signs of wear, the steps for replacement and the enduring benefits of timely maintenance will empower you to protect and enjoy the unparalleled driving experience your Porsche 928 offers. So, let’s gear up to ensure your classic beauty continues to turn heads and ignite hearts on the open road!
Understanding Your Porsche 928’s Timing Belt
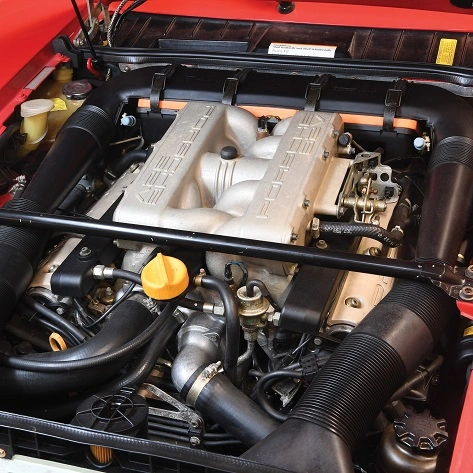
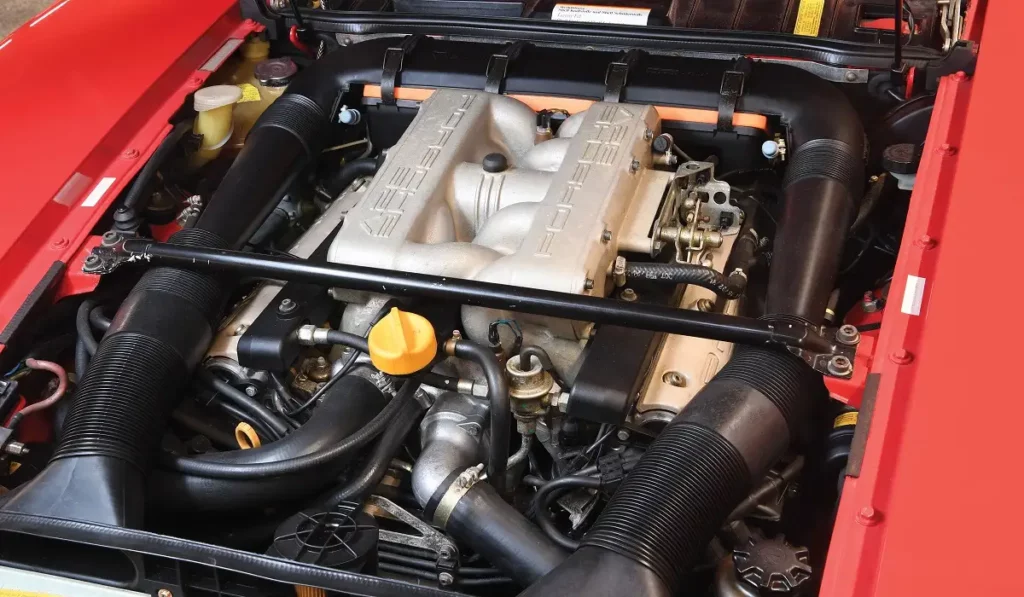
Our topic for today lies at the core of your Porsche 928’s robust engine — the timing belt. This critical component plays a pivotal role in the engine’s seamless operation. The Porsche 928’s timing belt ensures that all internal components move in harmony, preventing collisions within the engine that could lead to catastrophic failures.
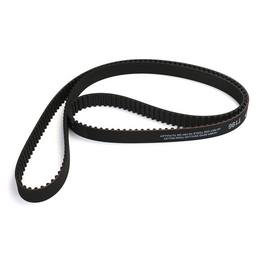
Here’s a fun fact to pique your interest: the Porsche 928’s timing belt stretches an impressive 82.5 inches, making it one of the longest-ever used in a production car. This remarkable length is a testament to the unique engineering that went into crafting the 928’s engine, designed to deliver unmatched performance and reliability.
The engine of the Porsche 928, with its avant-garde design, places an even greater emphasis on the importance of timing belt maintenance. The Porsche 928’s V8 engine, renowned for its power and efficiency, relies heavily on the timing belt to maintain its precise mechanical rhythm. Given the belt’s significant length and the engine’s sophisticated configuration, any slack or wear in your Porsche 928’s timing belt could lead to imprecise valve timing, reduced performance, and even severe engine damage.
Therefore, ensuring the timing belt is in optimal condition is not just a matter of routine maintenance; it’s a critical practice to safeguard the heart of your Porsche 928, ensuring that this classic masterpiece continues to deliver the exhilarating driving experience it’s famed for.
Signs It’s Time for a Replacement
Recognizing the right time to replace the timing belt in your Porsche 928 is crucial for maintaining its legendary performance and preventing potential engine damage. Here are the telltale signs and symptoms that indicate your timing belt may need attention or replacement:
Warning Light Illumination — If your Porsche 928 still operates with the original belt tensioner, a dedicated warning light on the dashboard will illuminate to signal a belt tension issue. This warning is a direct call to action to inspect and possibly replace the timing belt.
Unusual Noises — A worn or loose timing belt may produce a ticking or squeaking sound from the engine bay. These noises are caused by the bearings on the pulleys and could signify the need for inspection of the timing belt.

Engine Misfires — A slipped timing belt can lead to engine misfires, where the engine runs unevenly or loses power. This occurs due to improper timing of valve movement relative to the spark needed for combustion. If the valves open or closed late, it can lead to a misfire and, worse, catastrophic engine damage.
Rough Idling or Difficulty Starting — A degraded timing belt can affect the engine’s timing, leading to rough idling or difficulty starting the car. This symptom indicates that the belt may have stretched or lost some of its teeth.
Visual Signs of Wear — If you have the opportunity to inspect the timing belt visually, look for signs of wear, such as cracks, fraying, or areas where the belt appears shiny or glazed. These visual cues suggest that the belt’s integrity may be compromised.
Service Interval Due — The Porsche 928’s timing belt must be replaced every 45,000 miles or every three years, whichever comes first. Adhering to this replacement interval is vital, as neglecting timing belt maintenance can lead to severe engine damage. A failed timing belt can cause the engine’s valves to collide with the pistons, resulting in expensive repairs and potentially irreparable engine damage.
Porsche 928 Timing Belt Replacement
Replacing the timing belt on your Porsche 928 is a task that demands respect for the engineering behind this classic sports car and an understanding of the challenges it presents. This section is designed to navigate you through removing the Porsche 928 early S4s timing belt, ensuring safety and success.
Understanding the Task
Replacing a timing belt on a Porsche 928 is considered a complex and intricate job for an average DIYer, primarily due to the engine’s sophisticated design and crucial role in engine performance. The task requires precision, patience, and understanding of mechanical engineering principles.
Safety First!
Before rolling up your sleeves for timing belt DIY replacement on your Porsche 928, ensure a safe environment to prevent accidents and protect your vehicle. Start by preparing your workspace in a well-lit, clean, and organized area to enhance visibility and minimize hazards.
Personal safety is paramount, so equip yourself with safety glasses to shield your eyes from debris and working gloves to protect your hands from sharp components and chemicals. Wear snug-fitting clothing to avoid entanglement in moving parts. Lastly, install fender covers to protect your prized Porsche 928’s paint job.
Before beginning the repair, let the engine cool completely to avoid burns. Disconnect the battery, starting with the negative terminal, to eliminate the risk of electrical shocks or unintended engine activation. Adhering to these safety measures lays the foundation for a secure and efficient repair process.

Tools Required List
Porsche 928 timing belt replacement requires a specialized toolkit. The list below outlines the essential tools — from wrenches to timing alignment tools — ensuring you’re well-prepared for a smooth and efficient repair process.
- Safety goggles
- Working Gloves
- Wheel chocks
- Hydraulic jack rated 2-ton
- Jack stand “flat top” design rated 2-ton
- Coolant drain tray
- Zip ties
- Paint marker
- Binder clips
- Lubricating oil spray
- ½”, ⅜”, and ¼” ratchet and socket set
- Allen key bit socket set
- Torx bit socket set
- Combination spanner set
- Screwdriver set
- Timing belt tensioner tool (Kempf tool)
- Flywheel lock tool
- 2-jaw and 3-jaw pulley puller
- Prybar set
- Breaker bar
- Torque wrench
Raising the Porsche 928 and Removing the Underneath Covers
- Safely jack the car up until you have reached your desired working height.
- Install the jack stands on the lift points on all sides of the car.
- Removing front and rear engine underneath cover (8mm and 10mm screws).
Draining Coolant
- Remove both side engine block drain plugs (13mm socket).
- Remove the radiator drain plug (large flat screwdriver).
- Open the coolant reservoir cap.
- Let the coolant drain as much as possible, catching it with the coolant drain tray.
- Reinstall both side engine block drain plugs with new sealing rings (25 ft. lb – 35 Nm).
- Install new radiator drain plug (13 in. lb – 1.5 Nm).
Air tubes and coolant Hoses
- Remove both air intake tubes.
- Remove the upper radiator hose (10mm clamp).
- Disconnect the air bleeder hose on the thermostat housing (long flat screwdriver).
- Remove the lower radiator hose. Ensure to catch the dripping coolant in case (10mm clamp).
- Disconnect the heater return line from the thermostat housing. Ensure that you catch the dripping coolant in case (long flat screwdriver).
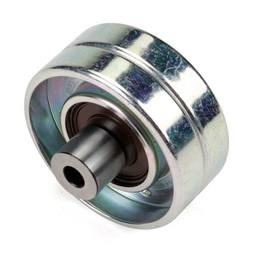
Auxiliary Drive Belts
- Loosen the alternator pivot bolt (13mm), then loosen the adjustment bolt lock nut and adjustment bolt (13mm). Afterward, remove the alternator belt.
- Loosen the air conditioning compressor’s front and rear pivot bolts (17mm).
- Remove the bolt for the air pump and air conditioning compressor bracket (13mm).
- Loosen the air conditioning compressor lock bolt (17mm) and adjustment nut (13mm) until the air conditioning compressor drive belt is loose.
- Loosen the air pump pivot bolt and locking bolt (13mm).
- Loosen the air pump adjustment nut (13mm) until you have enough slack to remove the air pump drive belt.
- Mark the belt’s position and rotation if it will be reused.
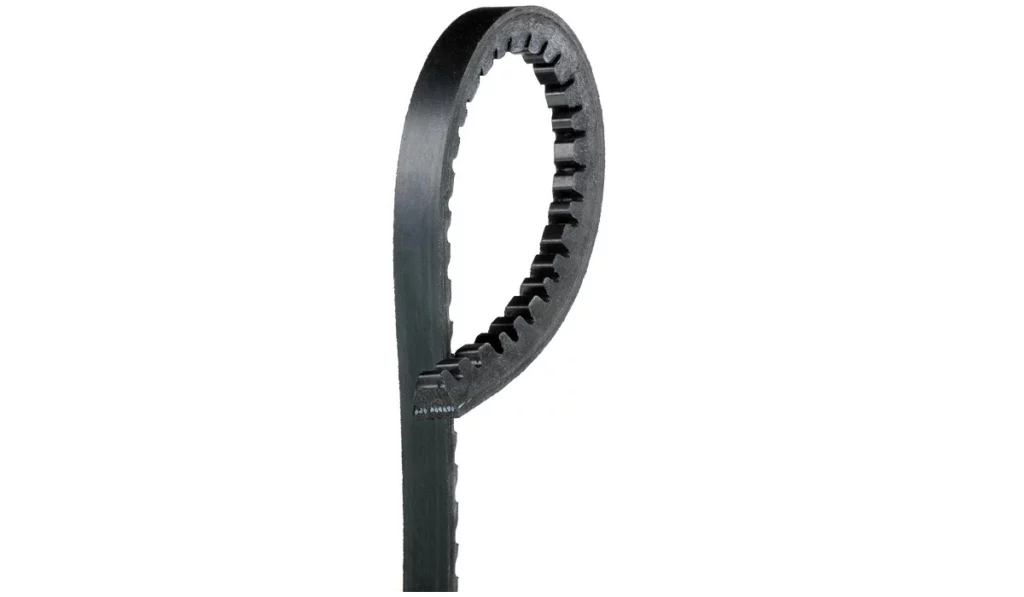
Don’t forget to use quality auxiliary drive belts! Check out our selection by clicking on the image above.
Radiator Fan Shroud
- Loosen and remove the power steering reservoir clamp.
- Remove the charging post nut cover and the charging post cover.
- Remove the air pump hose on the fan shroud by pulling on the plastic elbow. Remove the plastic elbow on the hose as a safety precaution.
- Set the air pump hose aside to get it out of the way while you are working.
- Remove the screws that hold the fan shroud to the radiator top section (10mm).
- Remove the fan shroud from the radiator by pulling it upwards and manipulating it so that it won’t get caught in the oil cooler lines.
- Disconnect the electrical connection of the radiator fan.
- Secure the power steering reservoir on the side using zip ties or string.
Alternator and Power Steering Pump
- Loosen the power steering pump tensioner’s lock nut (13mm) and the slider’s two locking bolts (13mm).
- Loosen the adjustment bolt until the power steering pump slides all the way to its loosen position.
- Loosen and remove the alternator’s tensioner bracket bolt and pivot bolt (17mm).
- Disconnect the ventilation pipe of the alternator.
- Move the alternator back and forth to unmount it.
- Be aware that the alternator is still connected to the wiring at the back; support it so that the wiring harness will not be stretched.
- Remove the power steering bracket bolts (2x13mm and 1x17mm); remember they have different lengths.
- Pull the power steering bracket out of its mounting and remove the power steering drive belt.
- Set it aside so the timing belt cover is free to work on.
Upper Timing Belt Cover
- Disconnect the sparkplug wires from the distributor and mark them using masking tape and marker to ensure proper fitting later.
- Remove the distributor cap on both banks (8mm).
- Remove the engine lifting bracket by removing four Allen head screws (2x5mm and 2x6mm). Set it aside on top of the engine and secure it with zip ties.
- Remove the engine oil dipstick, then undo the screw that holds the dipstick tube to the timing belt cover (10mm).
- Pull the dipstick tube out of the oil pan and ensure that its O-ring is removed.
- Block the opening with a rag or paper towel to prevent debris from entering the oil pan.
- Remove the upper timing belt cover on both banks. The bank 1 has two screws (10mm), and bank 2 has three screws (10mm).
Checking Timing Belt Tension and Alignment
- Turn the crankshaft clockwise until the “O|T” marking on the harmonic balancer is aligned with the pointer on the lower timing belt cover.
- Remember, the crankshaft is rotating twice with one revolution of the camshaft. This means that the “O|T” marking on the harmonic balancer could be lined up, but the camshaft gear markings are not.
- To ensure that the marks on the camshaft gears are aligned, look for a notch on the rear part of the camshaft gear. This notch should be aligned with the notch located where the top timing belt cover is fitted.
- If the markings on the camshaft gears are not aligned, rotate the crankshaft 360°, and those markings should now be lined up.
- With the engine in the TDC position, you can now check the tension of your Porsche 928’s timing belt using the timing belt tensioner tool (Kempf tool) and the timing marks alignment to ensure that the timing belt didn’t skip.
- You can now adjust the timing belt tension and alignment if you don’t plan to replace the timing belt on your Porsche 928 yet.
Setting the Crankshaft 45° Before Top Dead Center (BTDC)
- Setting your Porsche 928’s engine to 45° BTDC is the safest when working on the timing belt, as the valves and piston are the farthest in case the camshaft moves in this position.
- From the TDC position — the “O|T” mark on the crankshaft and both camshafts notched aligned — rotate the engine 1 ¾ clockwise until the 4|5 marking on the harmonic balancer aligns with the pointer on the lower timing belt cover.
- Mark the part of the camshaft gear that aligns with the notch on the camshaft gear back plate using a paint marker — where the top timing belt cover is fitted. This is done to ensure you have a reference point in case the camshaft moves while you work on the timing belt.
- Unscrew the flywheel inspection plate screws (13mm) underneath the vehicle.
- Install the flywheel locking tool on the inspection hole using a bit longer screws (13mm).
Auxiliary Pulleys and Lower Timing Belt Cover
- With the crankshaft locked, unscrew the crankshaft bolt using a breaker bar and heavy-duty socket (27mm).
- Remove the auxiliary pulleys by pulling them out. A few love taps with a rubber mallet will help to undo them.
- Spray the air conditioning pulley on the crankshaft with lubricating oil and let it sit for at least 5 minutes before removing it. If it’s still quite stuck to it, use an appropriately sized pulley puller to remove it.
- Locate the belt tension sensor wiring harness on the lower timing belt cover and carefully disengage the plastic locking tab to remove it.
- Unscrew the four bolts that hold the lower timing belt cover (3x10mm and 1x13mm). Keep in mind that the length of the screw varies.
- After removing all four bolts, pry the lower timing belt cover a few inches forward until you can access and disconnect the belt tension sensor connected to the stock belt tensioner pivot arm.
- Remove the lower timing belt cover.
- Remove the harmonic balancer. If it doesn’t come off by just hand-pulling it, use an appropriately sized pulley puller to remove it. Make sure to install the crankshaft bolt first when doing so.

Porsche 928’s timing belt removal
- On the stock timing belt tensioner, locate the adjustment bolt and its locking nut. Lose the lock nut first, then the adjustment bolt (both 17mm).
- Continue loosening the adjustment bolt until the timing belt has lost its tension.
- Unscrew the bolt that holds the timing belt tensioner contact strip on the tensioner arm (4mm Allen key).
- Unscrew the bolt that holds the tensioner arm (4mm Allen key) and remove it from its mount. If it’s stuck, use an appropriately sized pulley puller to remove it.
- Remove the outer timing belt guide on the crankshaft gear.
- Locate the ends of the two wiring harnesses (small and big) that come out under the bank 2 camshaft gear. They need to be detached in order to remove the timing belt.
- The small wiring harness is attached to a junction box at the rear of the oil cooler lines that go to the radiator assembly. Remove its cover and undo the screw to remove it (screwdriver).
- Feed the small wiring harness at the back of the power steering fluid reservoir until it is free.
- To remove the big wiring harness, disconnect the air conditioning compressor activation line and undo the charging post nut (11mm).
- Pull up its connector, unscrew the wiring harness clamp (10mm), then feed the harness behind the camshaft backplate until the big wiring harness is free.
- Remove the timing belt from the camshaft gear on bank 1 to the crankshaft and to the bank 2 camshaft gear until you remove the timing belt.
- With the timing belt removed, you can now perform other repairs, such as replacing the oil seals, water pump, idler pulleys, and other repairs that require the removal of the timing belt.
- The most important step in this DIY guide is now to pat yourself on the back. It’s a difficult job, but you did it!
eEuroparts.com — Your One-Stop Shop for Unmatched Parts Selection and Value
At eEuroparts.com, we take pride in catering to the diverse needs of European car enthusiasts with an extensive selection of OEM, aftermarket, and, most notably, genuine parts. Our commitment to quality and variety ensures that you’ll find the perfect match for any repair, restoration, or upgrade project for your European vehicle. What sets us apart is not just our vast product range but our unbeatable pricing.
We guarantee the best prices online for all European car parts, making us the go-to destination for cost-effective automotive solutions. Whether you’re searching for that elusive genuine component for your Porsche 928 or reliable OEM parts for routine maintenance, eEuroparts.com delivers excellence without compromise.
Installation and Engine Timing
- Feed the ends of the wiring harnesses (big and small) through the timing belt.
- Route the timing belt on the crankshaft gear partially to the oil pump, the bank 2 camshaft gear, and the water pump pulley.
- Install the tensioner arm to the spindle. Ensure the timing belt is routed correctly — bank 1 camshaft gear aside — before tightening the bolt (7 ft. lb – 10 Nm).
- Install the timing belt tensioner contact strip on the tensioner arm (44 in. lb – 5 Nm)
- Start matching the timing belt tooth to the crankshaft and oil pump gear. Ensure that the belt is routed with uniform tight tension.
- Remember the markings you have written on the camshaft gear using a paint marker? Ensure that they are still aligned as you match the timing belt tooth to the camshaft gear.
- If there is a bit of deviation, turn the camshaft using a spanner (17mm) until the painted marks are aligned with the notch on the camshaft gear backplate.
- Once the timing belt is installed on the bank 2 camshaft gear with proper tension and matching marks, install a binder clip to keep them in place.
- Route the belt under the water pump pulley with the same uniform tension.
- Check the paint marks on the bank 1 camshaft gear and ensure they are lined up. Install the timing belt once confirmed.
- Tighten the adjustment bolt on the stock timing belt tensioner until the slack on the timing belt is gone. Use the timing belt tensioner tool (Kempf tool) to check the initial tension on the belt.
- Check the paint marks again to see if they are still lined up to the notch on the camshaft gear backplate, and ensure that the timing belt teeth are seated properly on the gears.
- Install the outer timing belt guide on the crankshaft gear and the harmonic balancer. Tighten the crankshaft bolt initially.
- Remove the flywheel locking tool underneath and rotate the crankshaft clockwise two revolutions until the water pump’s pointer is pointing to the O|T mark on the harmonic balancer.
- Inspect the actual timing marks on the camshaft gears and ensure they match the camshaft gear back plate notch.
- Check the timing belt tension using the timing belt tensioner tool (Kempf tool) until the correct tension is achieved.
- Rotate the crankshaft 2 revolutions again until the O|T mark is reached, then confirm that the timing belt tension is correct.

Tightening Torques
- Upper timing belt cover (10mm) — 7 ft. lb (10 Nm)
- Lower timing belt cover (10mm) — 7 ft. lb (10 Nm)
- Lower timing belt cover (13mm) — 15 ft. lb (20 Nm)
- Power steering pump bracket (13mm) — 15 ft. lb (20 Nm)
- Power steering pump bracket (17mm) — 30 ft. lb (40 Nm)
- Alternator bolts (17mm) — 30 ft. lb (40 Nm)
- Crankshaft Bolt (27mm) — 217 ft. lb (295 Nm)
Your engine is perfectly timed now. From here on out, you’ll need to retrace your steps to finish the installation — pretty much the reverse of the removal process. Just remember to bleed the cooling system, and that’s it.
Hey, hats off to you! After tackling such an impressive DIY project, you’ve more than earned the right to kick back with a refreshing ice-cold beer. Cheers to your hard work and patience!
Post-Replacement Maintenance — Porsche 928 Timing Belt
Replacing the timing belt in your Porsche 928 is a significant step towards ensuring the vehicle’s longevity and performance. However, the journey doesn’t end with replacement. To maintain the health of your newly installed timing belt and the engine, consider these post-replacement maintenance tips:
Regular Inspections — Make it a habit to visually inspect the timing belt at regular intervals, even after a recent replacement. Look for signs of wear, such as fraying, cracking, or glazing on the belt’s surface. Regular inspections can catch potential issues early, preventing more severe problems down the line.
Check Belt Tension — Proper tension is crucial for the timing belt’s performance. An overly tight belt can lead to excessive wear, while a belt that is too loose might slip or jump. If your Porsche 928 uses a Porket chain tensioner, understand its pros, such as precise tension control and durability, and cons, such as omitting the timing belt alarm on your instrument cluster.
Listen for Unusual Noises — Stay attuned to any new or unusual noises coming from the engine area, particularly sounds that may indicate a misalignment or issue with the timing belt. Early detection of such sounds can save you from costly repairs.

Follow Maintenance Schedules — Adhere to recommended maintenance schedules for the timing belt and all engine components. Regular maintenance ensures that all parts work harmoniously, reducing undue stress on the timing belt.
Consider Related Components — When performing timing belt maintenance, also check associated components such as the water pump, belt pulleys, and tensioners. These parts can affect the belt’s performance and longevity, so replacing or maintaining them in tandem with the timing belt can ensure optimal engine health.
Keep Records — Maintain a detailed log of all maintenance performed on your Porsche 928, including timing belt replacements. This record can be invaluable for tracking maintenance schedules and understanding the vehicle’s history, which is particularly beneficial for classic cars like the 928.
Regular, proactive maintenance is the key to a healthy timing belt and engine in your Porsche 928. By following these post-replacement tips and keeping a close eye on the condition of your timing belt and related components, you can ensure that your Porsche 928 remains a reliable and exhilarating companion on the road. Remember, a little attention and care can go a long way in preserving the performance and legacy of your cherished classic.
Porsche Classic Perfection — Precision Parts Available at eEuroparts.com
For Porsche 928 enthusiasts seeking to maintain their classic’s timeless elegance and performance, eEuroparts.com stands as the premier destination for genuine and OEM parts. We understand the significance of precision in preserving the legendary prowess of Porsche classics. That’s why we offer an unparalleled selection of top-quality components at the most competitive prices online.
Whether undertaking a meticulous timing belt replacement or restoring your precious Porsche Classic, our extensive inventory ensures you’ll find exactly what you need without breaking the bank. Choose eEuroparts.com for your Porsche 928 and experience the perfect blend of affordability and excellence. Trust us to keep your classic Porsche running like a dream because when it comes to Porsche perfection, we accept nothing less than the best.

