
The VW Tiguan is a popular SUV known for its performance and fuel economy — a true daily driver! One of the people’s favorite engine choices is the TSI 2.0T engine. What can we say? This engine has some oompf, but it’s still efficient. No wonder VW Group has this engine installed on many VW, Audi, and even Porsche model lines.
However, a significant concern among these engines produced from 2008 to 2013 is the timing chain tensioner, which is crucial in maintaining the engine’s timing. Proper timing is essential for optimal engine performance and fuel efficiency.
When the timing chain tensioner fails, it can lead to severe engine damage, often without warning, making it a ticking time bomb for Tiguan owners. Addressing this issue proactively is vital to prevent catastrophic consequences and ensure the vehicle’s longevity. And this guide will cover just that!
Tiguan’s Timing Chain Tensioner — Explained
The timing chain tensioner ensures the timing chain maintains the correct tension, which is critical for synchronizing engine components for optimal performance. It uses a hydraulic and spring mechanism to adjust the chain’s tension, keeping the engine’s timing accurate.
The issue at hand is the camshaft chain tensioner on the 2.0-liter four-cylinder TSI and TFSI range, which include engine codes CCTA, CBFA, CAEB, CAEA, CDNC, and CPMA produced from 2008 to 2013. This is due to the bad design of the first-generation chain tensioner.
Over the years, Volkswagen has re-engineered the timing chain tensioner to prevent it from collapsing, bending valves, or damaging cylinder heads. However, hundreds of thousands of these engines installed during that period may not have the updated timing chain tensioner yet.
What causes timing chain tensioner failure?
The timing chain tensioner failure can be attributed to various factors, including the degradation of its spring mechanism due to age and low oil pressure affecting its hydraulic function.
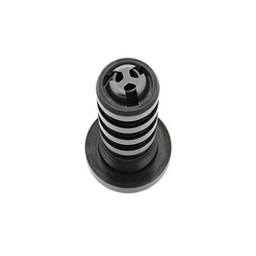
The timing chain tensioner failure on the VW Tiguan, particularly in the first generation, has a specific design flaw. This tensioner design has a metal sleeve that could come loose and fall out. This would break the latch loose, causing the tensioner to collapse and skip the timing, which could result in significant engine damage.
The Widespread Impact
The timing chain tensioner issue extends beyond the VW Tiguan, affecting many vehicles within the VW group. This problem is particularly prevalent in models equipped with the TSI 2.0 engine.
Various models and engine types across the VW and Audi lineup have been prone to similar issues, highlighting the widespread impact of this defect. For more detailed information, interesting news, and specific model examples, our guide on Audi and VW 2.0T timing chain issues has that covered. It is worth the read.
When did VW update timing chain tensioner?
VW updated the timing chain tensioner in models from 2013 onwards to address the widespread issues that caused a lawsuit in earlier models. This change was made to improve reliability and prevent the timing chain problems that affected a broad range of vehicles within the VW group.
The most updated timing chain tensioner that BMW engineers have implemented has an updated ratchet mechanism without the metal sleeve that may come off. This ensures that the chain tensioner will last longer than its older design.
Signs of a Faulty Timing Chain Tensioner on VW Tiguan
Common symptoms of a failing timing chain tensioner in the VW Tiguan commonly start with an unusual engine rattling noise and engine warning light activation, with a P0016 code while reading DTCs using an OBD II scanner. Left unaddressed, the engine stalls and will not restart. The engine does not start despite fast cranking, indicating a lack of compression.
Most of the time, the timing chain tensioner may give up without prior warning — rattling noise — and the engine may just die and won’t restart. You will be lucky if your VW Tiguan gives you that heads-up. If not, you will be looking at a repair that may cost you north of $3000.
Experience the Best in VW Parts with Amazing Savings
eEuroparts.com is your go-to online destination for a wide range of genuine Volkswagen and OEM parts, all available at exceptionally competitive prices. Our commitment is to equip each VW enthusiast with superior auto parts, eliminating the burden of high maintenance costs.

Our extensive inventory is intentionally selected to align with your Volkswagen’s distinctive requirements, promising an exact fit and adherence to OEM norms. With eEuroparts.com, expect to make impressive savings without compromising the quality of your parts, making us the top pick for DIYers who demand the best value and steadfast reliability on their European car.
Reminder Before Rolling Up Your Sleeves
Before you dive into inspecting or replacing the timing chain tensioner in your Volkswagen Tiguan, it’s crucial to prioritize safety and preparation. Here’s a gentle reminder of key precautions and steps to take:
Safety Instructions for Working on Your Car
Disconnect the Battery — Before starting any work, always disconnect the battery to prevent electrical shocks or accidental engine starts. This is a fundamental safety step in automotive maintenance.
Cold Engine — Ensure the engine is cool before you begin working. A hot engine poses burn risks and could lead to coolant or oil spills that are dangerous when hot.
Use the Right Tools — Having the correct tools for the job is about efficiency and safety. Using inappropriate tools can lead to injuries or damage to your vehicle’s components.
Protective Gear — Always wear protective gear, including working gloves to protect your hands from sharp edges and chemicals and safety glasses to shield your eyes from debris or spills.
Stable Work Environment — Make sure your Tiguan is securely supported when you raise it. Use quality jack stands and never rely solely on a hydraulic jack. Ensure the work area is stable and flat.
Stay Informed — If you’re unsure about any step of the process, consult a professional. There’s no substitute for expert advice, especially when dealing with complex engine components.
Keeping these safety instructions in mind will help ensure a safer maintenance experience and protect both you and your Volkswagen Tiguan during the inspection and potential replacement of the timing chain tensioner.


VW Tiguan Timing Chain Tensioner Inspection
Determining whether your Tiguan has the outdated tensioner version can be straightforward. However, proceed cautiously and ensure you’re familiar with the engine layout and components. Gather the tools listed below to start inspecting the timing chain tensioner on your Tiguan.
- Safety goggles
- Working gloves
- Flashlight/work light
- Hydraulic jack
- Jack stand
- ½” drive ratchet and socket set
- Impact wrench
- 17mm wheel lug socket
- Torx bit socket set
- Screwdriver set
- Inspection mirror
Lifting the Tiguan
Locate the jacking point on all sides of the car. It’s marked with a triangle — or an arrow — in the vehicle’s body, pointing into its jacking point on the frame underneath. Lift the car up and install the jack stands. Give it a bit of a push to ensure that the vehicle is lifted securely.
Front Right Wheel Liner
Remove the front right wheel by removing the wheel lugs using a 17mm socket. Place the wheel under the car as an additional safety precaution. Afterward, remove the wheel housing liner by undoing multiple T25 screws to reveal the lower timing chain cover.
Inspection Plug
Remove the charge air pipe from the intercooler to the turbo by undoing the two screws holding it in place and pulling on its release clips on both ends of the pipe. You will find the inspection plug for the timing chain tensioner placed on the top left of the crankshaft pulley — harmonic balancer.
Using a flat-blade screwdriver, carefully remove the plug by prying it out. Once removed, use an inspection mirror and a flashlight to look into the bore and check if the timing chain tensioner still has those notorious metal sleeves. If it does, then sadly, you’ll have to replace it.
If the timing chain tensioner is the updated version and you are still experiencing those symptoms, your timing chain might already be stretched. This scenario has become prevalent since VW updated the timing chain tensioner.
Resolving the Issue — Replacing the Timing Chain Tensioner
Remember that replacing the timing chain tensioner is not a simple task. It requires precision and an understanding of the engine’s mechanics. An incorrect installation could lead to severe engine damage.
In addition to the tools you used to inspect the timing chain tensioner, you will also need to gather the tools listed below to replace it.
- Counter Hold Tool T10355 for the harmonic balancer
- Thrust Piece T10368 as a spacer for the crankshaft bolt
- Torx bit socket set
- Triple square socket 12mm
- Gasket scrapper
- Allen key set
- Wooden block
- Cable ties
Removing the Upper Timing Chain Cover
First, pull the engine cover up to remove it and grasp a view of the upper timing chain cover. Then, remove the charcoal canister and noise generator pipe if they are equipped to gain access to the upper timing chain cover.
Undo the coolant pipes bracket bolts and set aside the coolant hoses to gain additional access. Disconnect and remove the camshaft adjustment valve and the oil dipstick from the upper timing chain cover.
Start unscrewing the 5 screws that hold the upper timing chain cover. Remove it and set it aside. You will now see both camshaft sprockets, which have the timing mark to know if the engine is in the top dead center.
Setting Engine to Top Dead Center
Rotate the crankshaft clockwise until the notch on the outer lip of the harmonic balancer is aligned with the mark on the lower timing chain cover at around 4 o’clock. Imagine that the harmonic balancer is the face of a clock. As for the timing marks on the camshafts, just ensure they are pointing upwards.
Removing the Harmonic balancer
With the prerequisite steps for the inspection of the timing chain tensioner done, such as removing the wheel, wheel housing liner, and charge air pipe, proceed as follows:
Remove the drive belt by releasing the tensioner using a spanner and lock it by inserting a 5mm Allen key into its service hole. If the drive belt is going to be reused, note its rotational direction.
Then, use the counter hold tool — T10355 — and remove the crankshaft bolt. It is tightened to 110 ft. lb (150 Nm) + 90°, so it will be really tight. Ask a friend to help you unscrew this bolt if you don’t feel confident doing this task alone.
Once the harmonic balancer is removed, reinstall the bolt again and hand tighten it with the thrust piece tool — T10368 — which will act as a spacer. This is done to prevent the crankshaft gear from coming out if you have to turn the crankshaft later on.
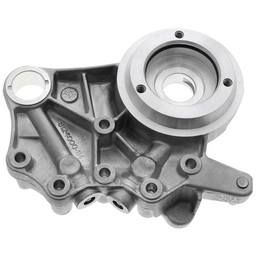
Supporting the Engine
Place a hydraulic jack with a wooden block under the engine oil pan to support the engine. This is done because we will have to remove the engine support bracket, which blocks the upper screws of the lower timing chain tensioner cover.
Once the engine is supported on the oil pan, remove the engine support and its bracket from the engine. Be aware that the engine is now only supported by the hydraulic jack at the oil pan, so no sudden movements, alright! Just be careful!
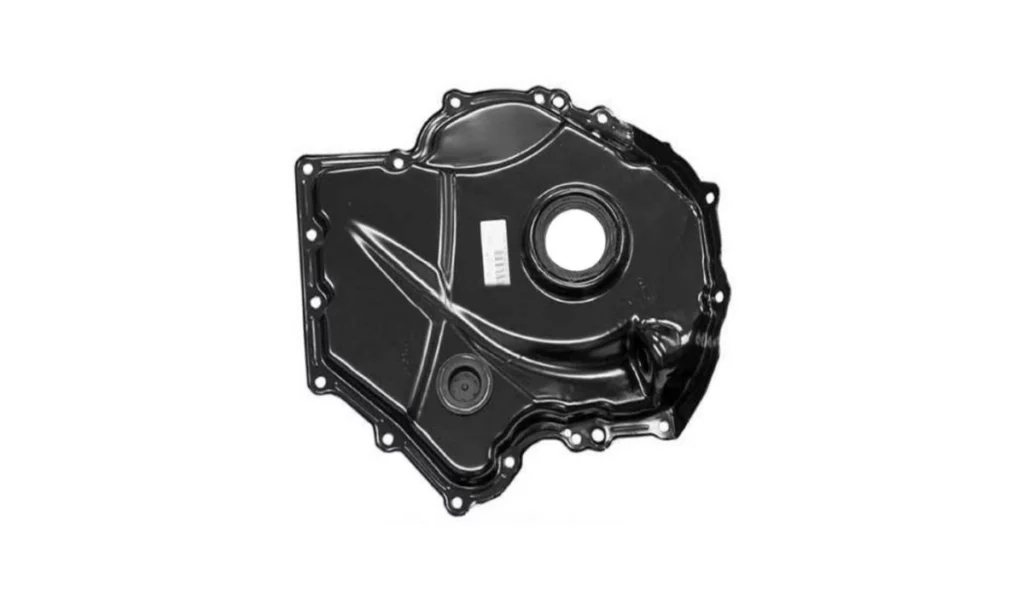
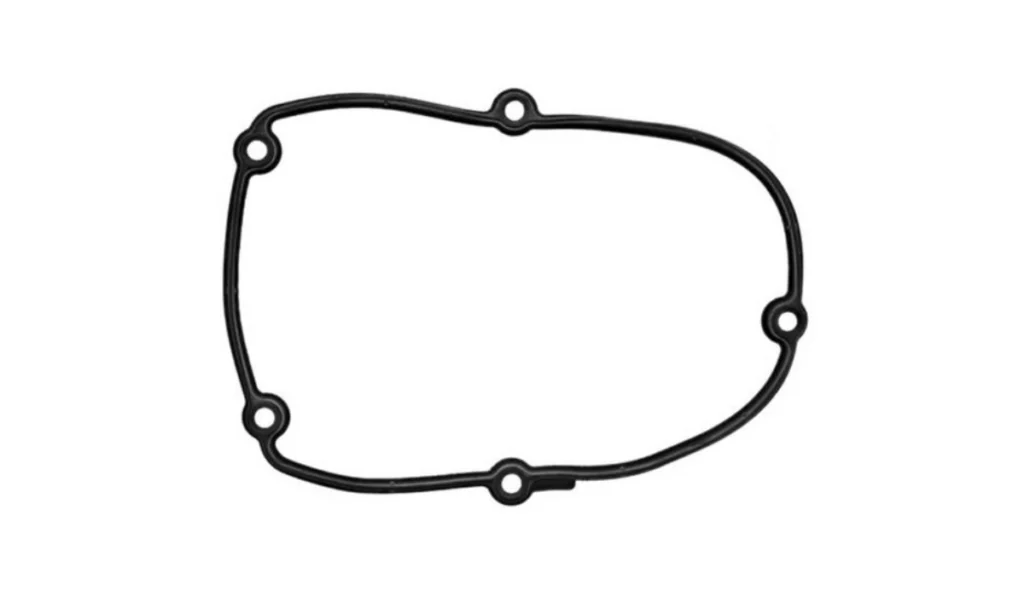
Removing the Lower Timing Chain Cover
The lower timing chain cover is held in place with 15 screws and a very durable sealant. Undo the screws and pry the lower timing chain cover, starting from the left side and moving the gap along the entirety of it.

VW recommends replacing it after each removal to ensure it will not leak after installation. However, if you want to gamble with it, you can most certainly reuse it. Just be aware of the consequences, such as an oil leak and the difficulty of removing it.
Let’s be honest: You don’t want to do this time-consuming and complicated repair again, so spare some cash and just replace it!
Replacing the Timing Chain Tensioner
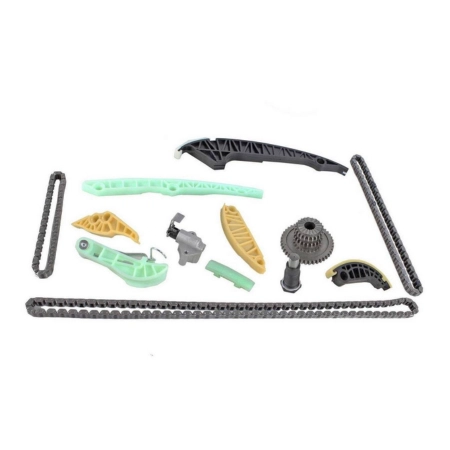
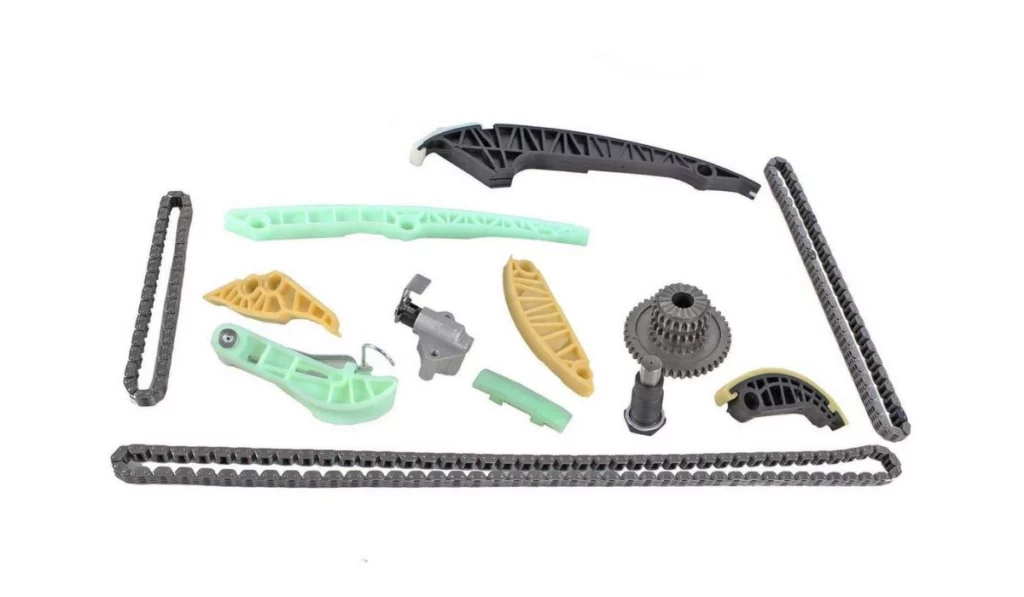
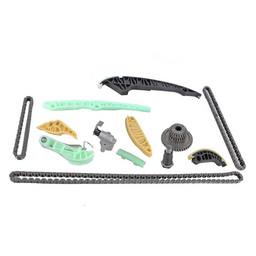
Once the lower timing chain cover has been removed, you can now view the internal guts of the engine. You’ll see the chain tensioners, guide rails, and 3 drive chains, which drive the oil pump, balance shafts, and the camshafts.
Let’s shift our attention to the timing chain tensioner and its guide rails. Try pushing back on the rear guide rail to see if the tensioner retracts. If it did, that’s a bad sign. You should also check your guide rails for any signs of damage or cracks.
To replace the timing chain tensioner, install a cable tie on the front and rear timing chain guide rail to keep their position and tension. Then, unscrew the two T30 screws to remove the timing chain tensioner.
This is done to prevent altering the current timing. That is if it is good. If it’s already bad from the start due to a stretched timing chain, you must replace those to fix your VW Tiguan’s timing issue. Good thing we offer a TSI 2.0 timing chain repair kit, which includes all guide rails, drive chains, and tensioner.
That concludes our replacement of the timing chain tensioner on the Volkswagen Tiguan. The reassembly process is essentially the reverse of disassembly. Carefully follow the steps you took during disassembly in reverse order to ensure every component is returned to its rightful place.
Reassembly Notes
Reassembling your vehicle after a repair can feel like the home stretch, but it’s crucial to maintain precision and care during this phase to ensure everything functions seamlessly. Here are some key notes to keep in mind during reassembly:
Timing Check — After reassembly, it’s vital to rotate the crankshaft 720° clockwise to verify the timing is correctly set. This step is crucial for preventing potential engine damage due to incorrect timing.
Maintain Cleanliness — Keeping the work area and components clean cannot be overstated. Dirt and debris can cause premature wear or even failure of engine components.
Seal Replacement — Always replace any seals that were removed during the repair process to ensure airtight and fluid-tight connections, preventing leaks and potential damage.

Silicone Sealant Application — When reattaching the lower timing case cover, clean the surface thoroughly and apply the right amount of silicone sealant to prevent oil leaks.
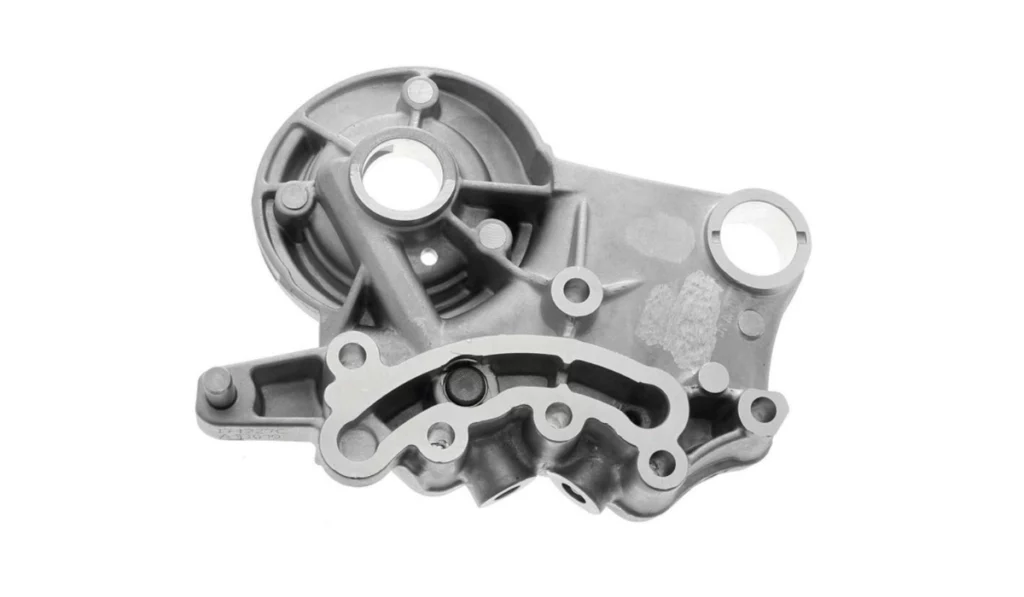
Camshaft Bridge Inspection — If you’re undertaking a comprehensive chain drive replacement using the timing chain repair kit, take the opportunity to inspect all removed engine components, including the variable valve timing solenoid and the camshaft bridge, particularly the filter. If the filter is compromised, replace the camshaft bridge to prevent potential engine issues.
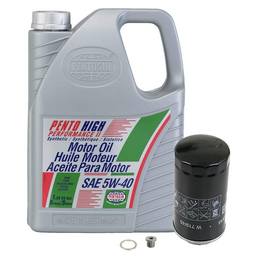
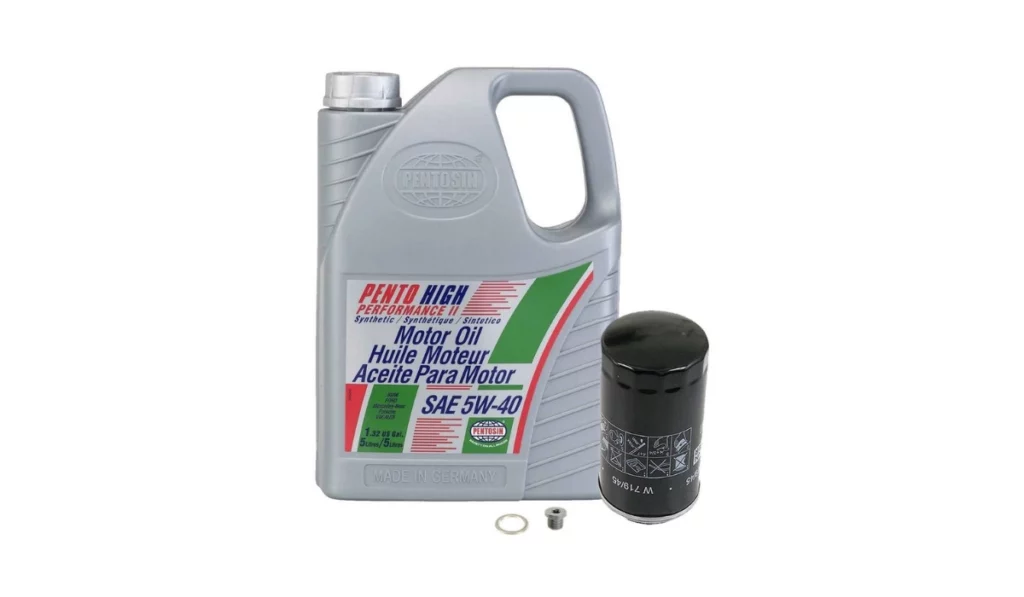
Conclude with an Oil Change — Finish your repair with an oil change. This is a critical step to remove any contaminants that may have entered the oil pan during the repair, ensuring your engine runs smoothly.
Remember, the reassembly process requires more patience than disassembly. Taking your time and paying attention to these details will help ensure a successful repair and the long-term health of your vehicle.
Tightening Torques
Adhering to specified tightening torques is crucial in DIY automotive repairs. It ensures components are secured with the right amount of force to prevent damage or detachment. Incorrect torque can lead to serious safety issues and compromised vehicle integrity. Below is a list of essential tightening torques that must be followed to maintain your vehicle’s safety and performance.
- Upper timing chain cover — 6 ft. lb (8 Nm)
- camshaft adjustment valve — 6 ft. lb (8 Nm)
- Timing chain tensioner — 6.6 ft. lb (9 Nm)
- Lower timing chain cover — 6 ft. lb (8 Nm)
- Crankshaft bolt — 110 ft. lb (150 Nm) + 90° (use new bolt)
- Wheels — 103 ft. lbs (140 Nm) front-wheel drive
- Wheels — 88 ft. lbs (120 Nm) all-wheel drive
Can I replace timing chain tensioner without replacing timing chain?
It’s possible to replace the VW Tiguan’s timing chain tensioner without changing the timing chain. However, it’s essential to consider replacing the timing chain if there is no known history of it being replaced. The timing chain is prone to stretching over time as the vehicle ages, potentially leading to the same issue of skipped timing.
Maintaining the TSI 2.0T Engine
Maintaining the TSI 2.0T engine ensures your Volkswagen Tiguan runs efficiently and remains reliable. Here are some essential maintenance tips to keep your engine in top condition:
Regular Maintenance Tips
Oil Changes — Use the manufacturer-recommended oil grade for the TSI 2.0T engine to ensure optimal performance and engine protection. Regular oil changes at the intervals specified in your owner’s manual help prevent sludge buildup and wear on engine components.
Oil Filter Selection — Choose high-quality oil filters that meet Volkswagen’s specifications. A good oil filter is crucial for removing contaminants from the oil and protecting your engine from potential damage.
Being Proactive
Listen for Abnormal Noises — If you notice unusual sounds from the engine, such as rattling or knocking, it could indicate a problem with the timing chain tensioner or other vital components. Don’t ignore these warning signs.
Misfire and Power Loss — Should your engine begin to misfire or you experience a noticeable drop in power, it’s time to investigate. These symptoms could relate to issues like spark plug degradation, fuel system problems, or a failing timing chain tensioner.
Addressing these concerns promptly can prevent more significant problems down the road and ensure your TSI 2.0T engine continues to deliver the performance and reliability you expect from your Volkswagen. Regular maintenance and being attuned to your vehicle’s needs are key to enjoying a smooth driving experience.
Volkswagen Parts? Choose eEuroparts.com
For top-quality Volkswagen parts, eEuroparts.com is your go-to source. Our extensive selection includes OEM and genuine parts designed to meet Volkswagen’s high standards, ensuring perfect compatibility and reliability for your vehicle. With competitive pricing and a wide range of parts, we make it easy and affordable to maintain your Volkswagen.
Our fast shipping process provides a seamless shopping experience. Trust eEuroparts.com for all your VW parts needs and join the community of enthusiasts who demand the best for their vehicles. Visit us today and keep your Volkswagen Tiguan running smoothly with our premium parts selection. Choose eEuroparts.com, where quality and passion drive everything we do.

