
The Porsche 944, a classic performance and precision engineering hallmark, proudly represents classic sports car lineage. Particularly in the Porsche 944 S and S2 models, the camshaft chain tensioner plays a crucial role. This component, exclusive to these models, is pivotal in maintaining synchronized engine timing and optimal functionality. Ensuring the correct tension of the camshaft chain prevents serious engine damage, underscoring its importance in the engine’s overall health.
This guide focuses on identifying signs of a failing chain tensioner in the Porsche 944 S and S2 models and provides a comprehensive DIY replacement process. Tailored for Porsche enthusiasts and hands-on mechanics, this article will equip you with essential knowledge and steps to uphold your Porsche 944’s performance. Gear up for an insightful journey into maintaining one of Porsche’s celebrated classics.

Porsche 944 Camshaft Chain Tensioner — Exposed!
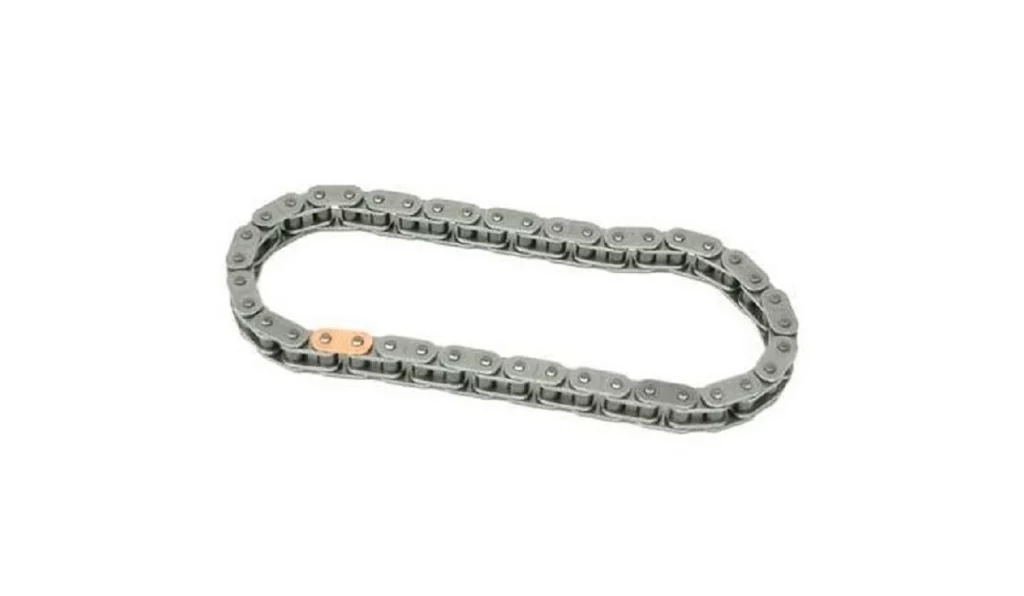
For the discerning Porsche 944 S and S2 models, the introduction of a self-adjusting timing chain tensioner represented a significant upgrade over the base model’s 8-valve, single overhead camshaft (SOHC) engine. The S and S2 variants boast 16-valve engines with dual overhead camshaft (DOHC), one camshaft driving the intake valves and the other for the exhaust valves. This complex setup is orchestrated by a timing chain synchronizing the exhaust camshaft with the intake camshaft, ensuring they move harmoniously.
The Porsche 944’s camshaft chain tensioner, nestled within this precise mechanism, is self-adjusting and oil pressure-controlled. However, it’s susceptible to wear over time and can fail, leading to dire consequences. The engine’s timing can be thrown off if the tensioner or associated components like the guide rails or oil supply pipe fail. Such a failure is more than an inconvenience; it can lead to the valves crashing into the pistons, an event as damaging as it sounds.

In the most severe cases, particularly for the S and S2 models, camshaft chain tensioner failure has been known to result in a cracked cylinder head, a costly and complex issue to resolve. Maintaining and monitoring this component must be addressed, as it is critical to the engine’s performance and longevity.
When to Replace Your Porsche 944’s Camshaft Chain Tensioner Pads
If there’s no record of the tensioner pads being replaced, it’s wise to prioritize this service. Overlooking this can lead to sudden and severe engine problems down the line. The collective wisdom of the Porsche 944 community suggests a replacement interval of every 90,000 miles. This preventative measure is a small investment in the grand scheme of your vehicle’s health and performance.
Encountering any definitive signs of a failing chain tensioner, as detailed in the next section, should prompt an immediate inspection. These symptoms are often the first indicators that your tensioner pads are due for a replacement. Addressing these signs early can save you from the inconvenience and cost of extensive engine repairs.
Definitive Signs of a Failing Chain Tensioner
When maintaining the integrity of your Porsche 944 S or S2’s engine, awareness of the chain tensioner’s condition is critical. A failing Porsche 944 chain tensioner can manifest through several telltale symptoms, each a call to action to prevent further damage. Here are the definitive signs that your Porsche 944’s chain tensioner may be on its last legs:
Unusual Noise — A clear indication that something is amiss. The sound of the chain scraping against the tensioner could be due to inadequate tension.
Misfiring — This occurs when the engine timing is out of sync, a direct consequence of chain tension issues.
Rough Idling — A Porsche 944 chain tensioner not performing optimally can lead to an engine that runs unevenly, especially when the engine hits higher revs.
Low Power — If you feel that your Porsche 944 lacks its usual zest, a slipping chain due to a failing tensioner could be the culprit.
The root causes of a failing Porsche 944 chain tensioner can be broadly categorized into mechanical and hydraulic failures. Mechanical failure often involves the breakdown of tensioner pads, which can fracture due to age or damage to the mechanism. Chain elongation over time can also lead to a loss of tension. On the hydraulic side, the tensioner relies on a steady oil pressure to function correctly. Any weakness in the oil pressure supply, potentially due to low oil levels or a leak in the J-tube — which channels oil pressure to the tensioner — can compromise its function.
A failing Porsche 944 chain tensioner is not just an inconvenience; it can lead to significant engine damage. Recognizing these signs and understanding their causes is the first step toward a timely and effective intervention.
Porsche 944 Chain Tensioner Pads Replacement Guide
Ensuring the longevity and performance of your Porsche 944 S or S2 starts with maintaining key engine components, and the chain tensioner is undoubtedly high on that list. When it comes to replacing this vital part, precision and caution are your best allies. This guide will walk you through the process step by step.
Safety First
Before you begin, safety must be your top priority. Working on your vehicle can present various hazards, so take the necessary precautions. Wear protective gear such as working gloves and safety goggles. Ensure the car is parked on a level surface and that the engine is cool to the touch. Disconnect the battery to prevent any electrical accidents. Use wheel chocks to prevent the car from moving.
Tools You’ll Need
Gather all the necessary tools before starting the job to make the process as smooth as possible:
- Working gloves
- Safety goggles
- Disposable rags
- Masking tape
- Acetone
- Open-end spanner
- Screwdriver set
- Flare-nut wrench
- ⅜” Ratchet and socket set
- Allen key bit socket set
- Needle nose pliers
- Gasket scrapper
- 1.5mm pin as a locking tool
- Woodblock
- Bench vise
- Rubber mallet
- Torque wrench
With safety measures in place and the right tools in hand, you’re ready to tackle the tensioner replacement. This guide will break down each step, from removing the old tensioner to installing the new one, ensuring you can confidently perform the replacement efficiently. Let’s get started on preserving the integrity of your Porsche 944’s engine.
Cables, Wires, Hoses
The Porsche 944’s Chain Tensioner is located inside the valve cover. So, to inspect and remove this essential part, we must get in there. Let’s start by removing all the cables, wires, and hoses in the way.

If your car is equipped with cruise control, remove the cable from the cruise control servo motor by sliding the metal clip outward and dislodging the cable from the ball joint by pulling it out. Next is to loosen the lock nut of the cable using a 13mm spanner and remove the cable from the bracket. Tie the removed cruise control cable in a way that it won’t be a hindrance to removing the valve cover.
Next is to remove the ignition system’s high-tension wires from the spark plugs. The wires could be too hard to pull so use a levering tool, like an appropriately sized spanner, to pry the wires out of the cylinder head cover. Then, you must remove the
high-tension wire brackets by unscrewing their mount from the valve cover using a screwdriver. Once the high-tension wires are removed with their bracket, set it aside so that the valve cover will be free to remove
Lastly, we have to disconnect the fuel lines. To do this, use a flare-nut wrench and unscrew the hose from its connection. One thing to note is that the other end of the connection is fixed and can snap if you don’t counter it using a flare nut wrench. Once loose, you can use an open-end spanner or turn it by hand to disconnect both fuel lines. Use rags to collect the fuel that may spill, and cover the pipe opening with masking tape to ensure no foreign debris will enter the system.
Valve Cover Removal
Next on our list is to remove the valve cover. To do this, we have to loosen the valve cover screws from outside going inside. Once all screws are removed, the bolt can be pulled out of its mounting so that it won’t fall. Give the valve cover some love taps with a rubber mallet to loosen it up, and the valve cover should easily come right out.

Once the valve cover is out, inspect your Porsche 944’s chain tensioner condition. Look for signs of chain rubbing on the cylinder head cover and cylinder head. Inspect the condition of the lower and upper tensioner pads. You can also inspect the timing chain condition for a loose link or unusual play.
Porsche 944’s Camshaft Chain Tensioner
To remove your Porsche 944’s chain tensioner, you must remove its oil supply tube, commonly known as the J-tube. Use a 10mm socket to loosen the banjo bolt on both ends. Start unscrewing the banjo bolt on the chain tensioner. Be aware that an aluminum sealing ring will be under the pipe, so be careful not to lose it inside the engine. Use needle nose pliers or an O-ring remover hook to fish it out. The same goes for the other end of the J-tube.
Next is to remove your Porsche 944’s chain tensioner. Ready your makeshift locking tool, this could be any rod/pin that can pass the access holes for the locking mechanism. Push the tensioner inward until you can insert the rod/pin into the access holes and prevent the tensioner from moving outward.
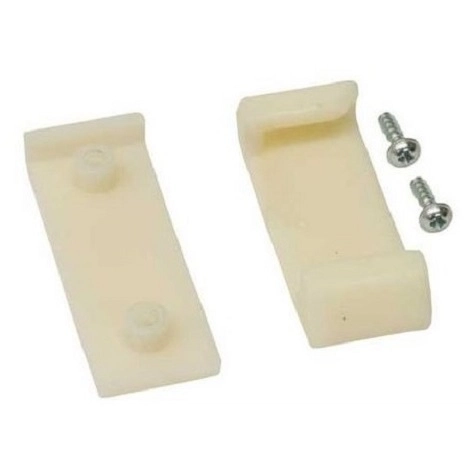
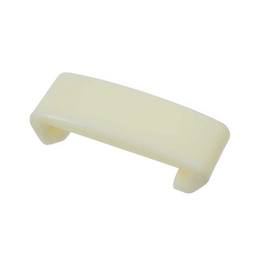
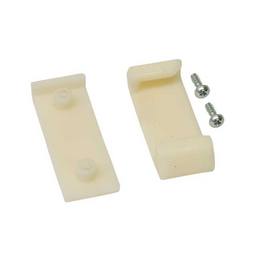
Unscrew the two mounting bolts of the locked chain tensioner and guide it out of the cylinder head. From here, you can replace the worn and deteriorated tensioner pads. Use a wooden block and a bench vise to press the tensioner again to remove the locking rod/pin. Once it is removed, slide out the top tensioner pad and undo two screws to replace the bottom tensioner pad.
Installation Notes
After replacing the tensioner pads, you must reinstall the locking rod/pin on the tensioner to install it back into the cylinder head. Tighten the mounting bolts to 7.5 ft. lb (10 Nm). Then, install the J-tube with new sealing rings and tighten the banjo bolt to 7.5 ft. lb (10 Nm). The sealing rings might fall off during installation, so a dab of grease will keep them in place.
Before installing the valve cover, ensure the mating surface is dirt-free and old sealant-free. Clean the cylinder head and the valve cover using disposable rags, acetone, and a gasket scrapper. Once everything is clean, install a new valve cover gasket and sparkplug hole gaskets on the valve cover, and put a small amount of gasket sealant on the corners of the cylinder head to ensure a leak-free repair! Then, tighten the valve cover screws to 7.5 ft. lb (10 Nm) from the inside going out to ensure that it is evenly tightened. The rest of the parts are installed in reverse of the procedure. That’s it. You have successfully replaced the tensioner pads!
eEuroparts.com, Your Expert Partner for Your Porsche 944!
When it comes to preserving the legacy of your cherished Porsche classics, eEuroparts.com stands as your premier resource. We understand the bond between a driver and their Porsche — it’s why we meticulously curate our collection of high-quality parts specifically designed for Porsche models.
Our commitment to excellence ensures that every part, from the smallest bolt to complete tensioner kits, meets rigorous standards. With an intuitive online catalog and a dedicated team of Porsche parts experts, eEuroparts.com delivers the right parts to your doorstep, ensuring your classic car continues to perform at its peak. Embrace the eEuroparts.com experience — where passion for Porsches and expertise unite to keep your automotive legacy alive.

